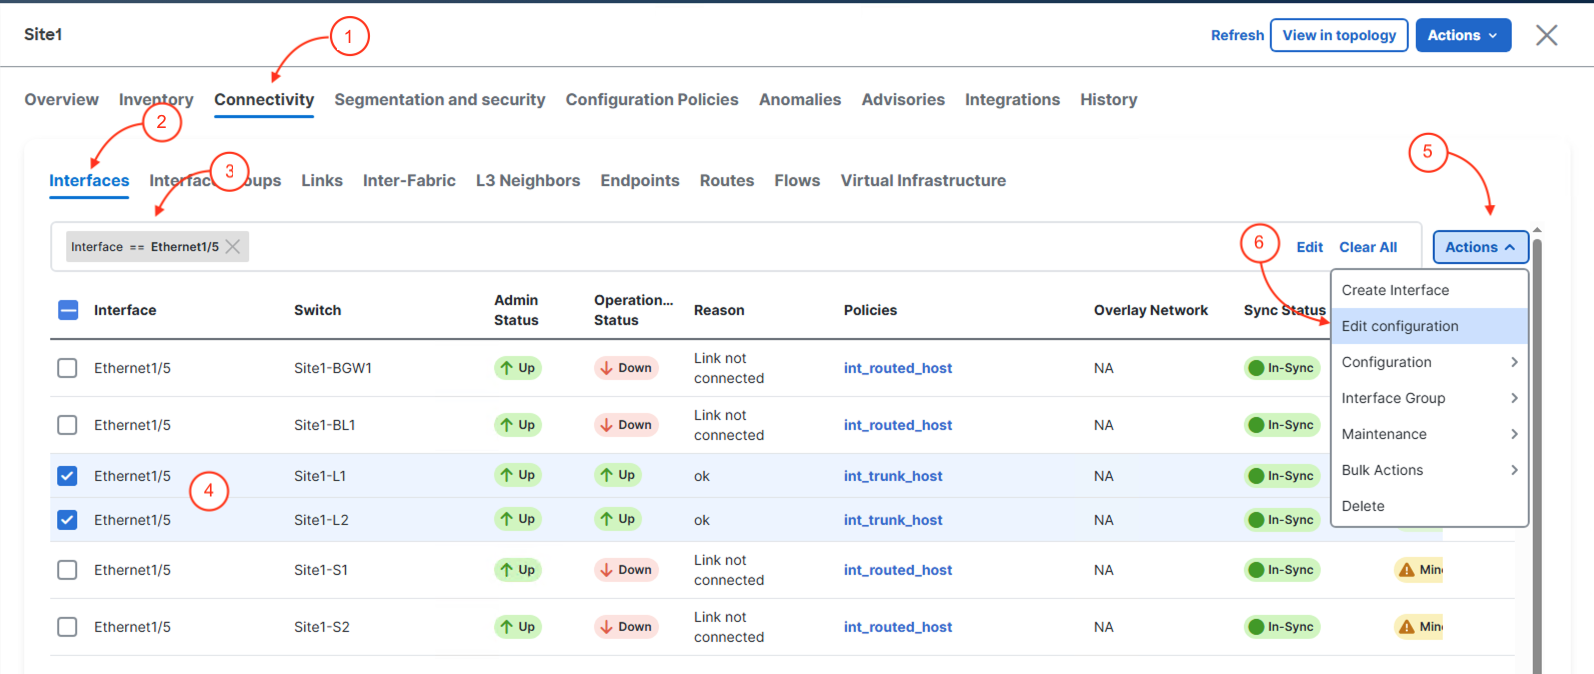
Nexus Dashboard lets you create and modify interface configurations much like using the command line. In this section, you'll practice editing an access interface using template policies, and learn to use filtering tools to quickly find and select interfaces.
Interface, then ==, and the interface name (e.g., Ethernet1/5).From the Overview dashboard, you need to navigate to Interfaces to view all the interfaces Nexus Dashboard is aware of from your switches and begin your next task.
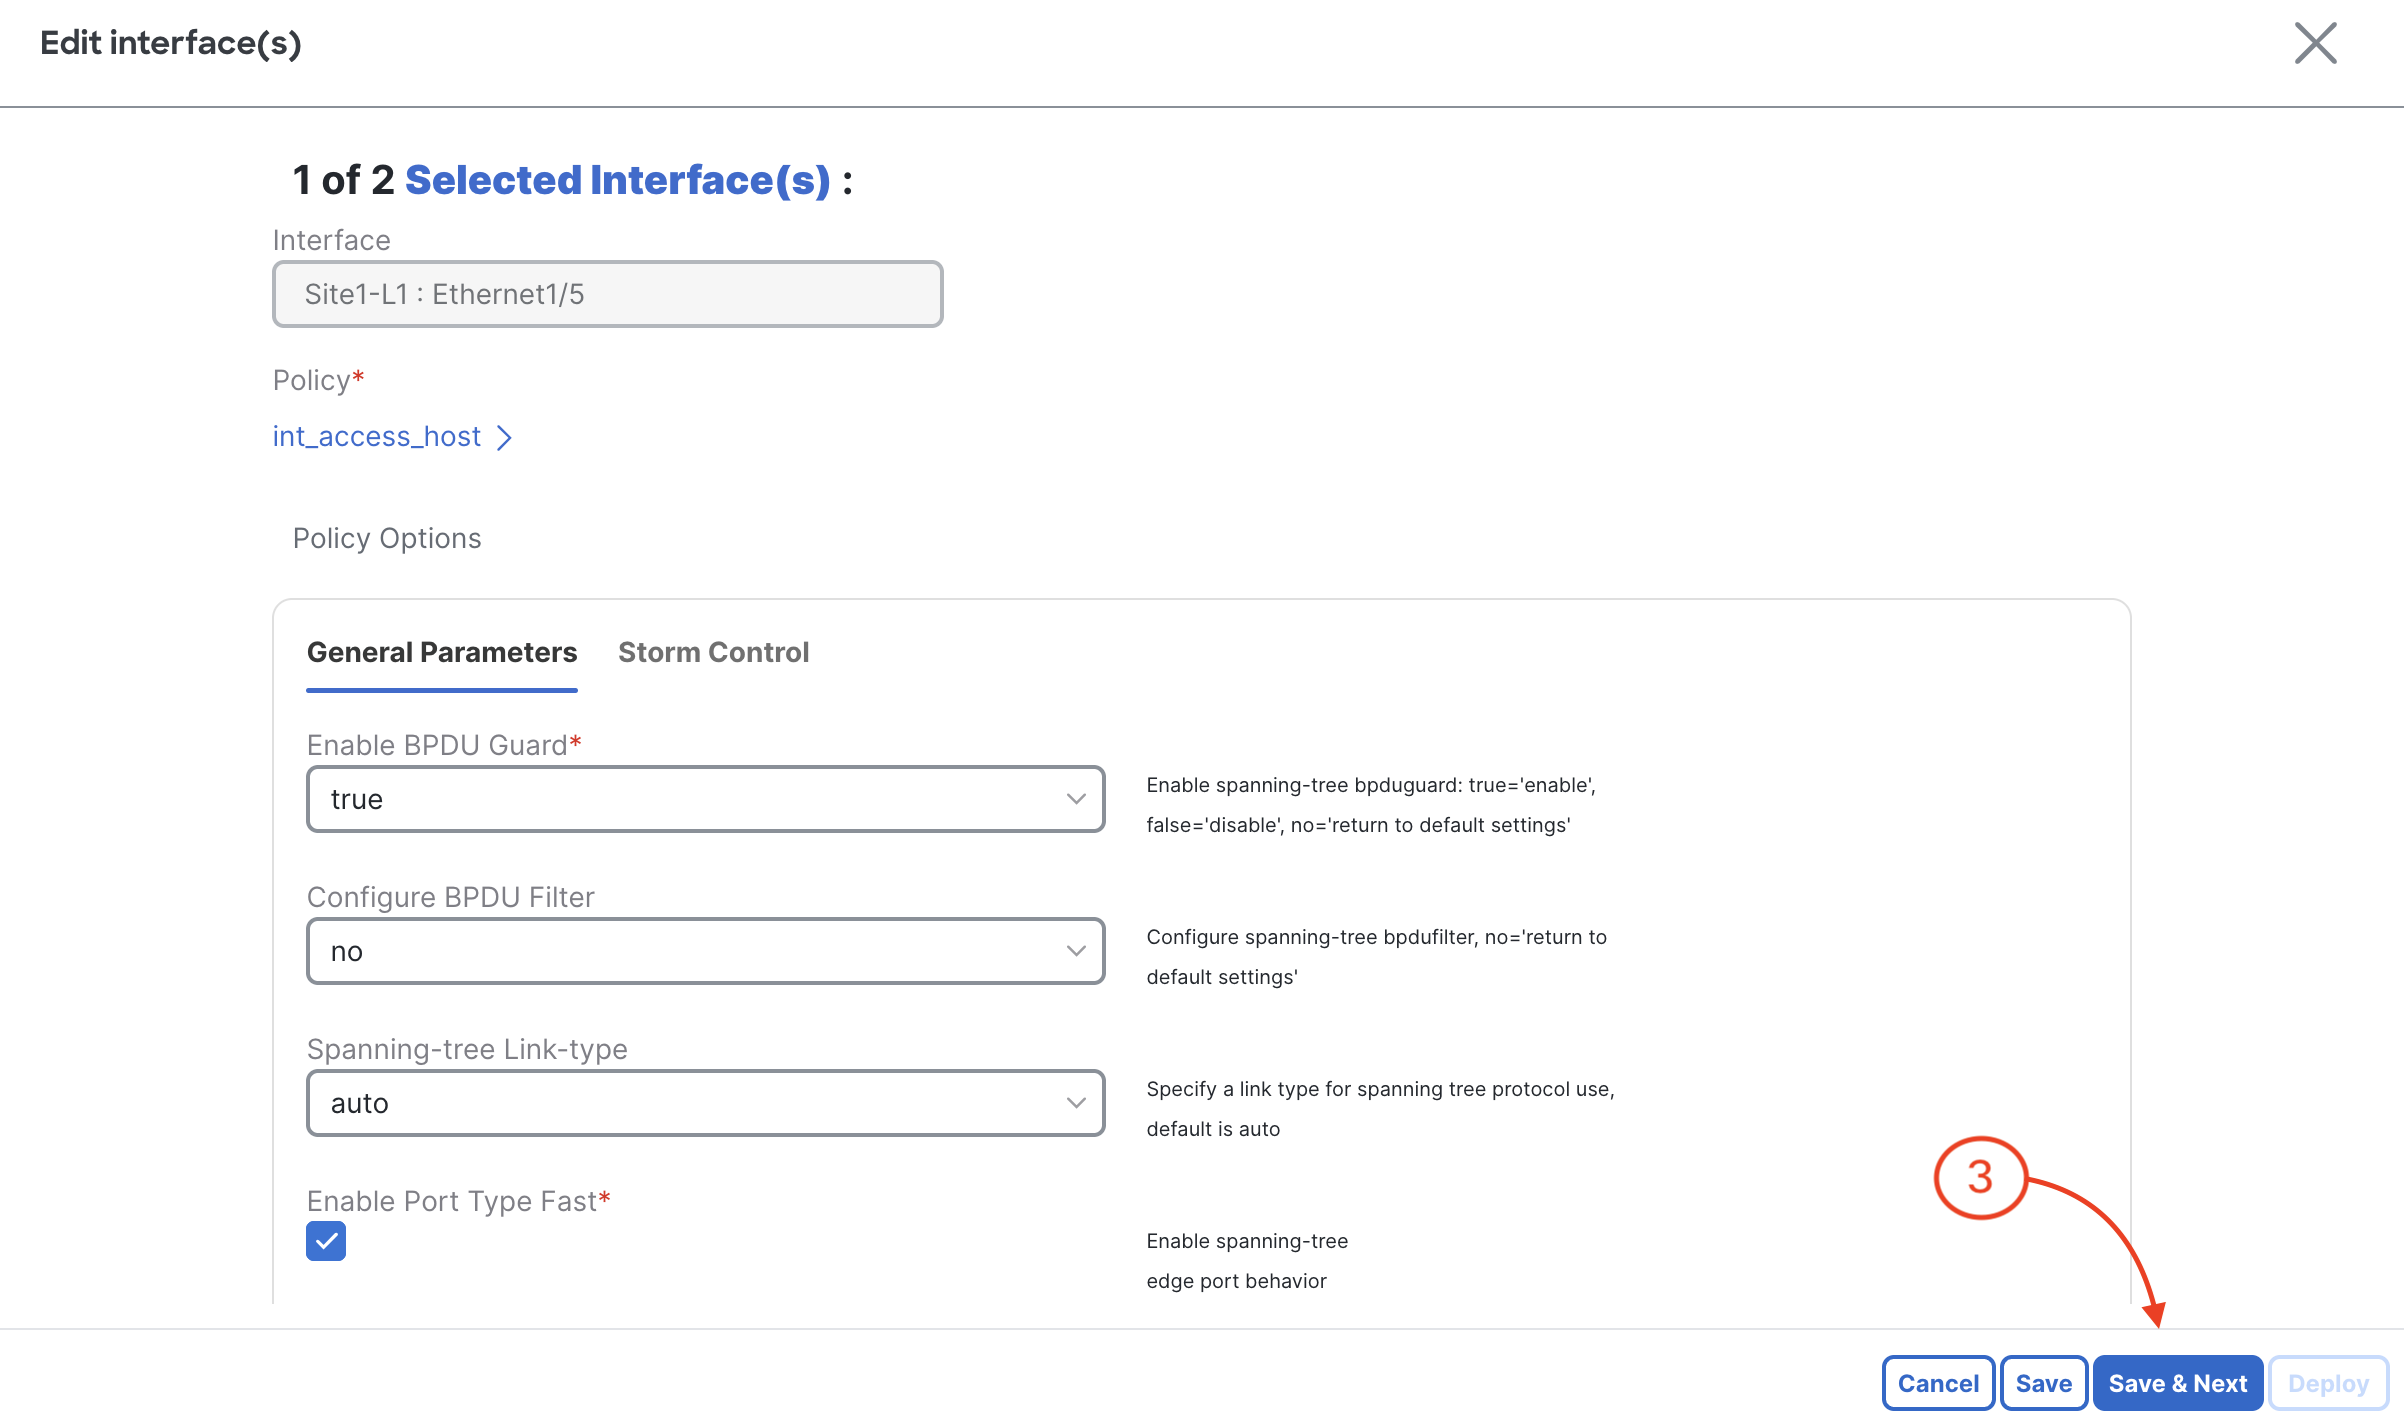
In the Edit interface wizard, notice Site1-L1 : Ethernet1/5 has int_trunk_host selected. This is the default Policy for the Leaf Switches. In this scenario,
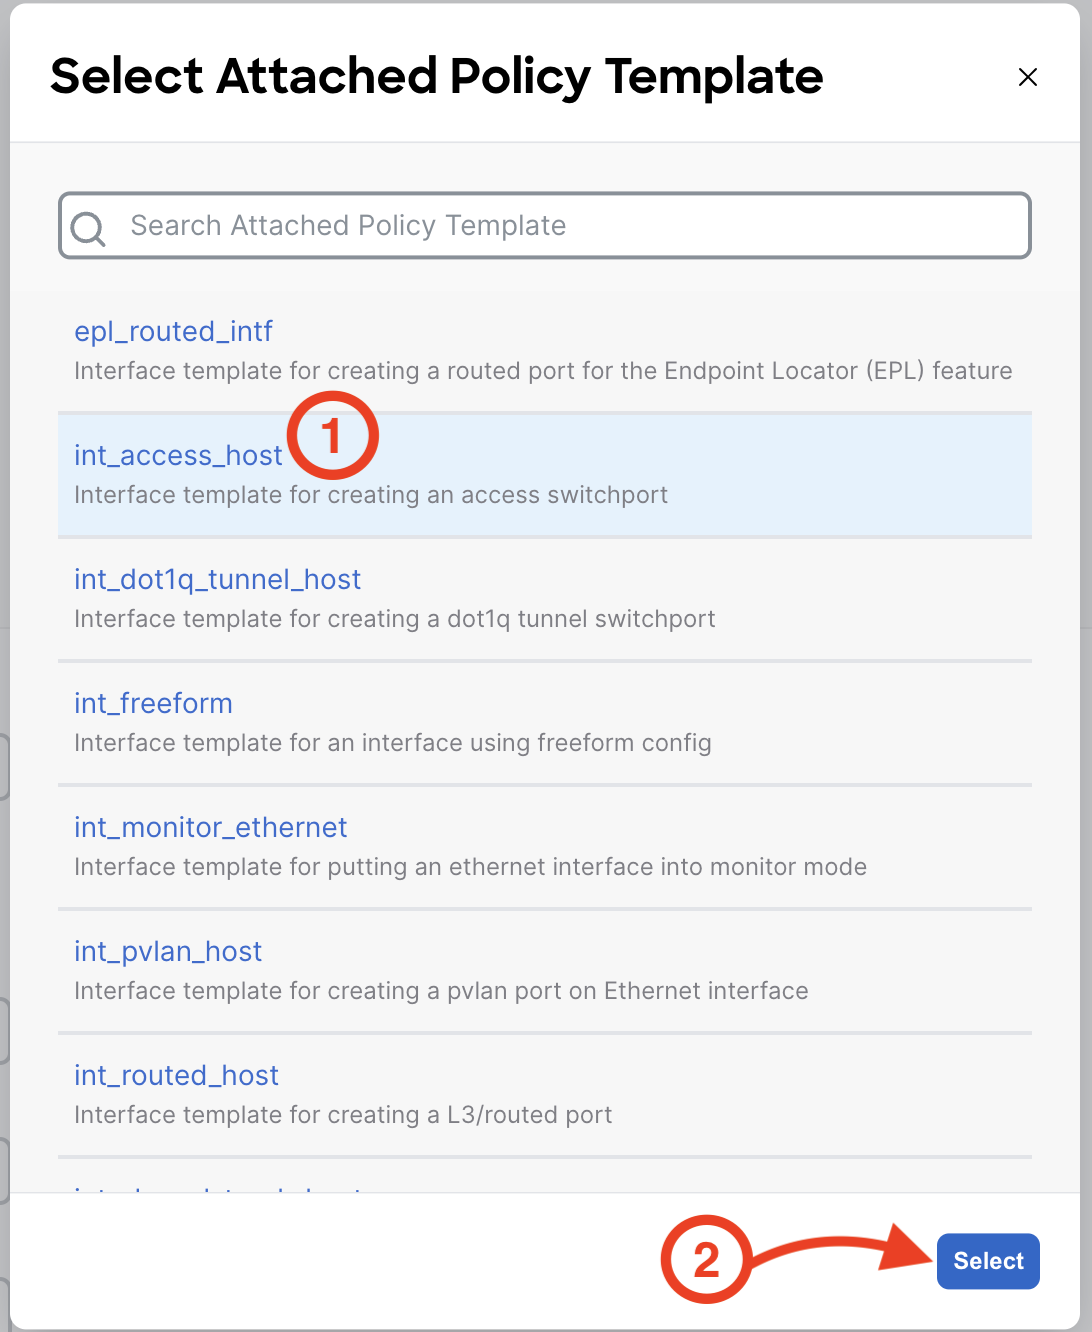
we will be highlighting how to change the default policy from int_trunk_host to int_access_host.
Launch the template policy selection pop up:

In the Select Attached Policy Template pop up you will select the policy template that will make your Ethernet1/5 interfaces on your Site1-L1 switch access interface.

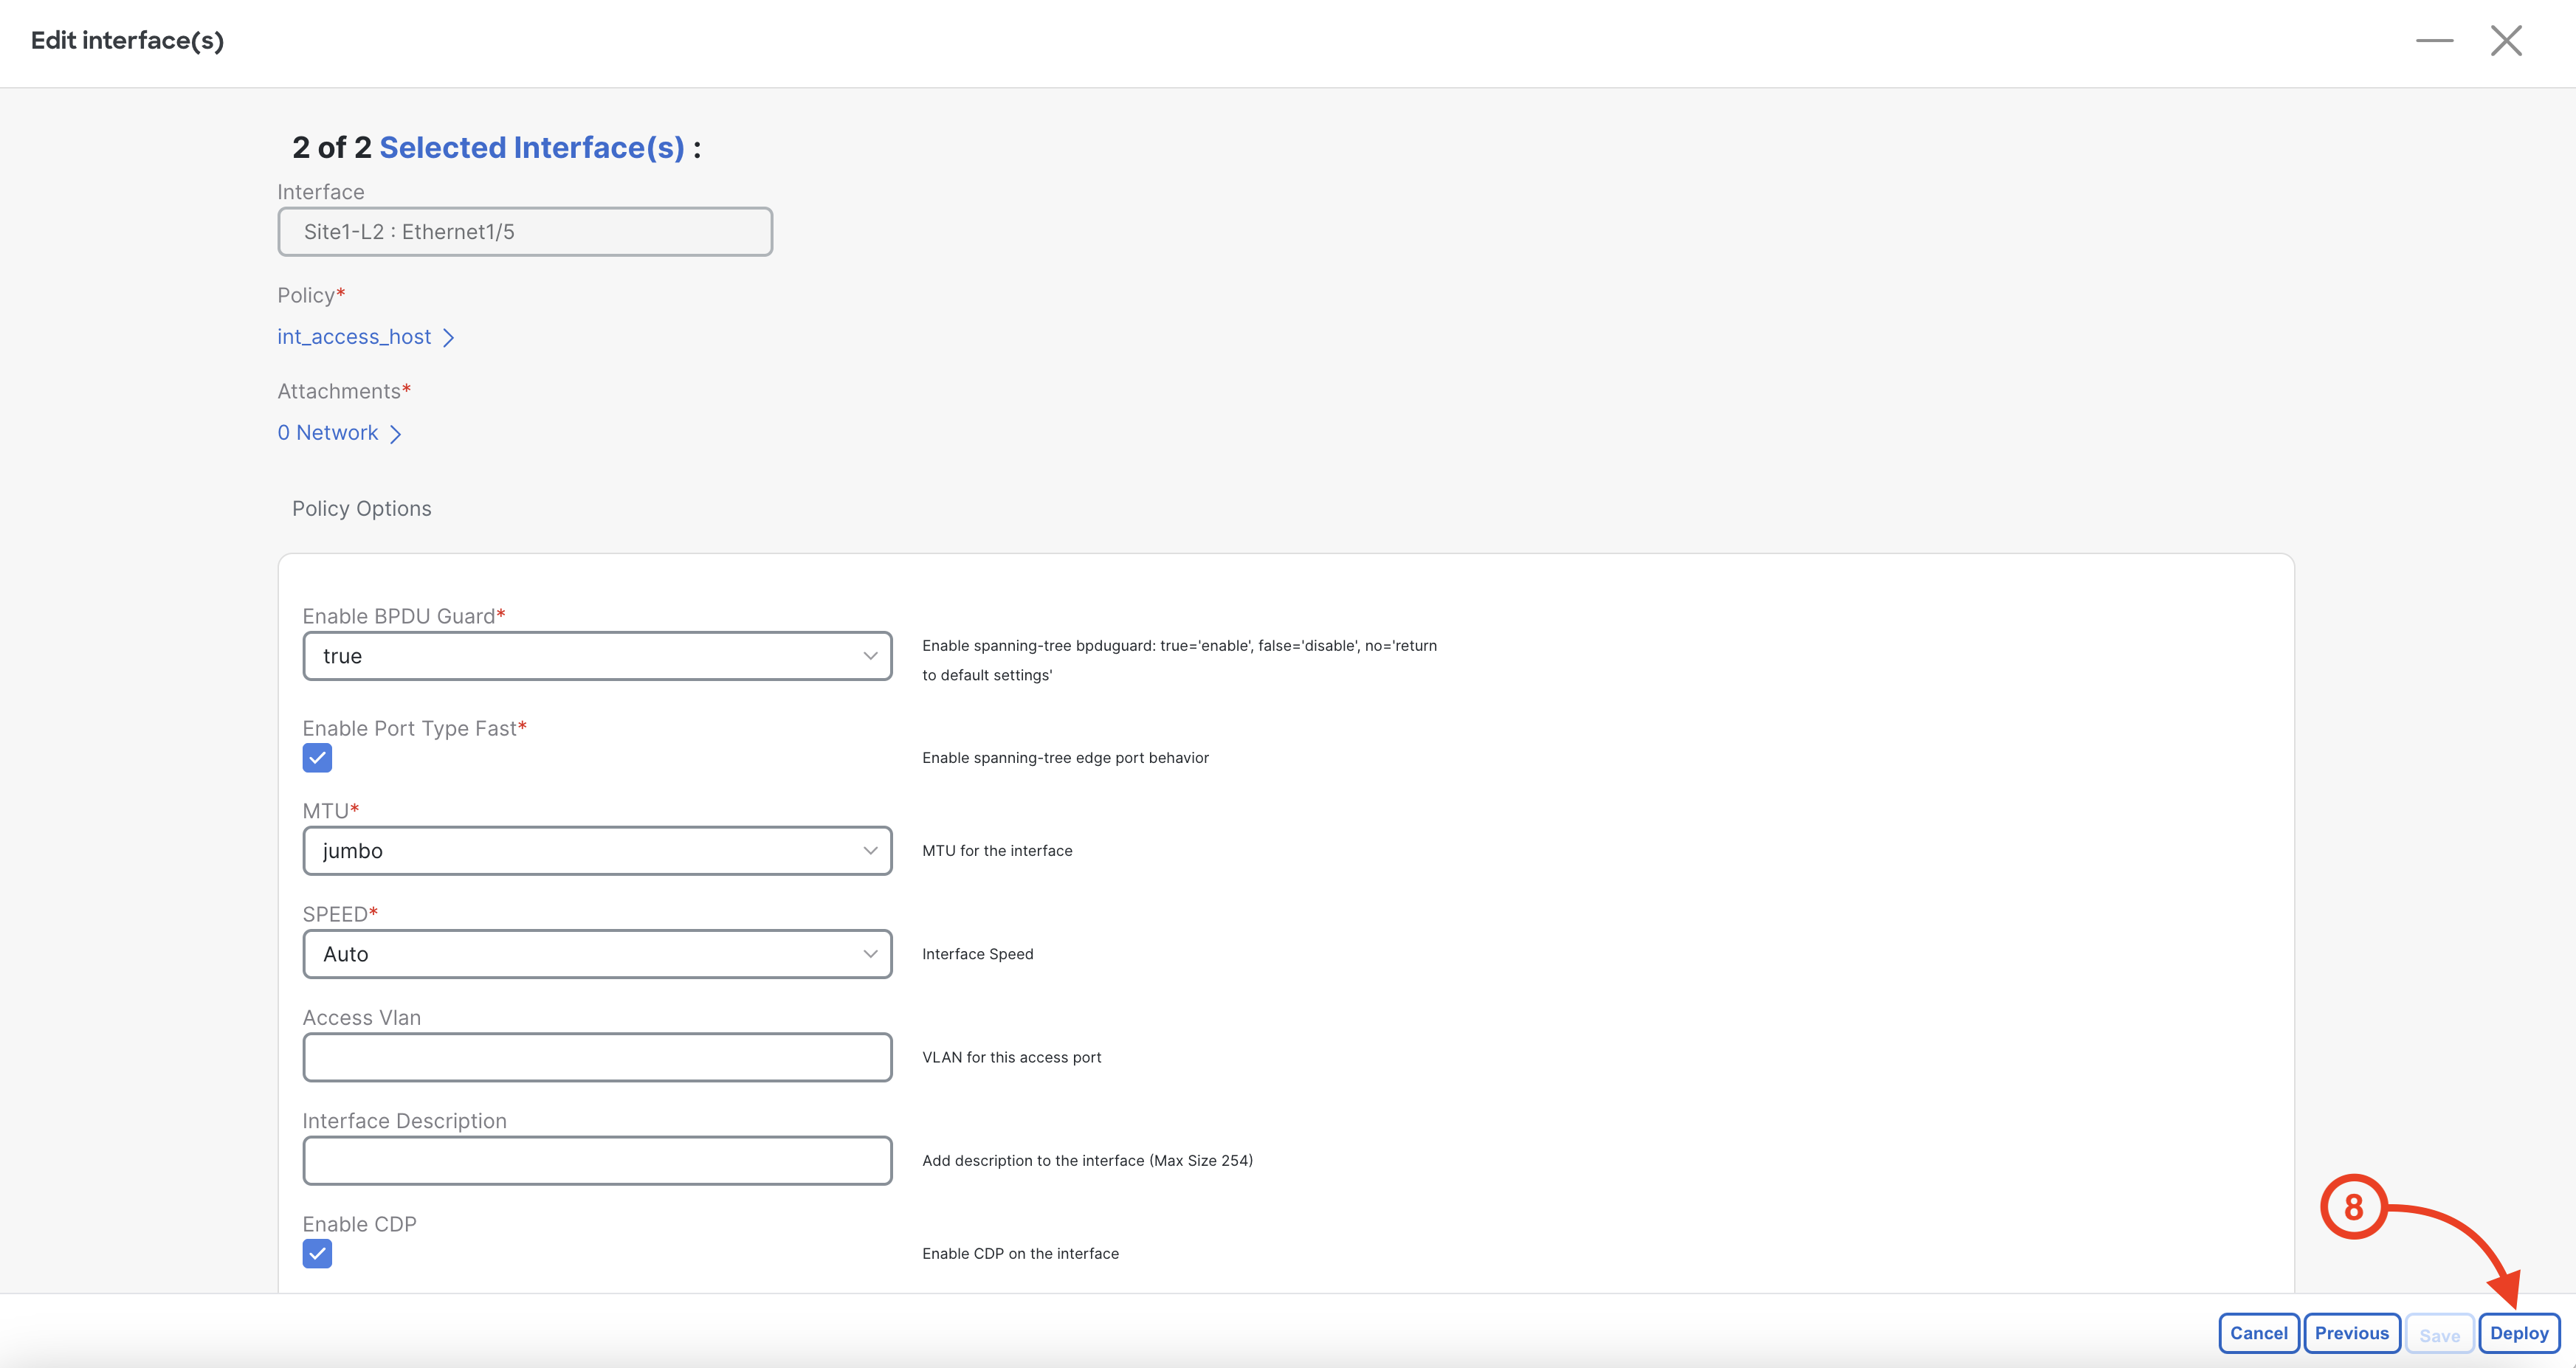
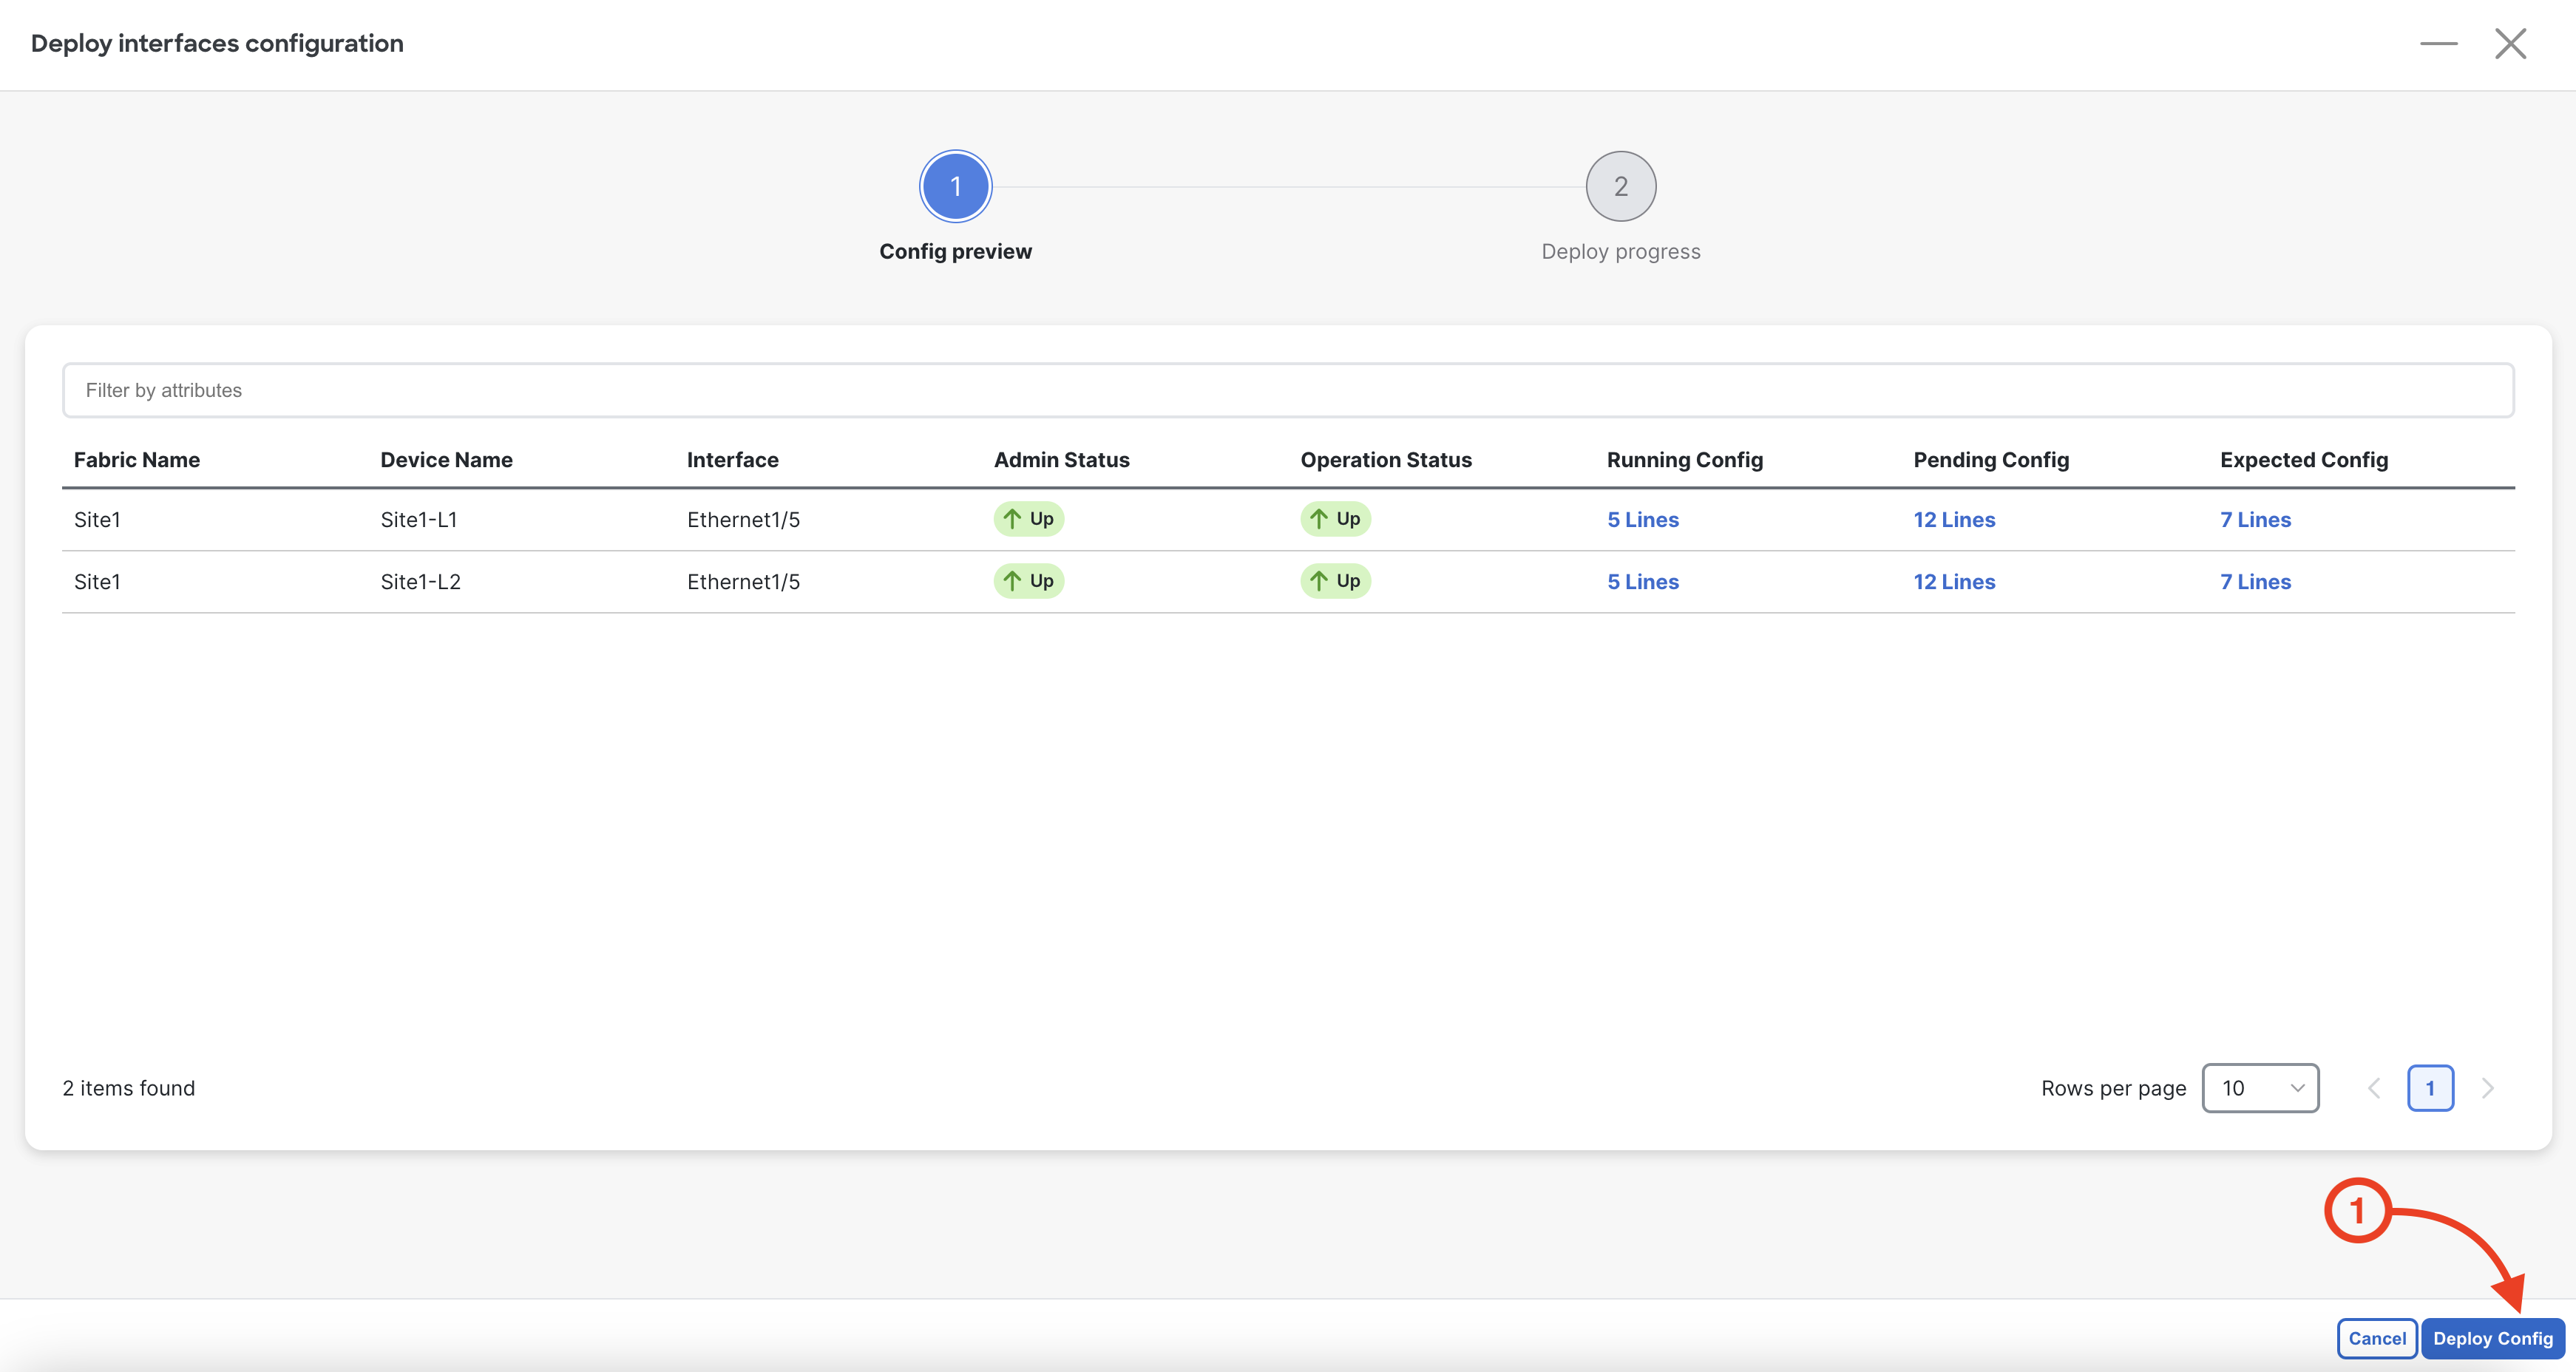
After clicking Deploy, Nexus Dashboard launches the Deploy interfaces configuration wizard. This view should look very similar to what you saw when performing the initial fabric deployment with the two stages and the option to review the pending configuration. Feel free to do so if you desire. Once done:
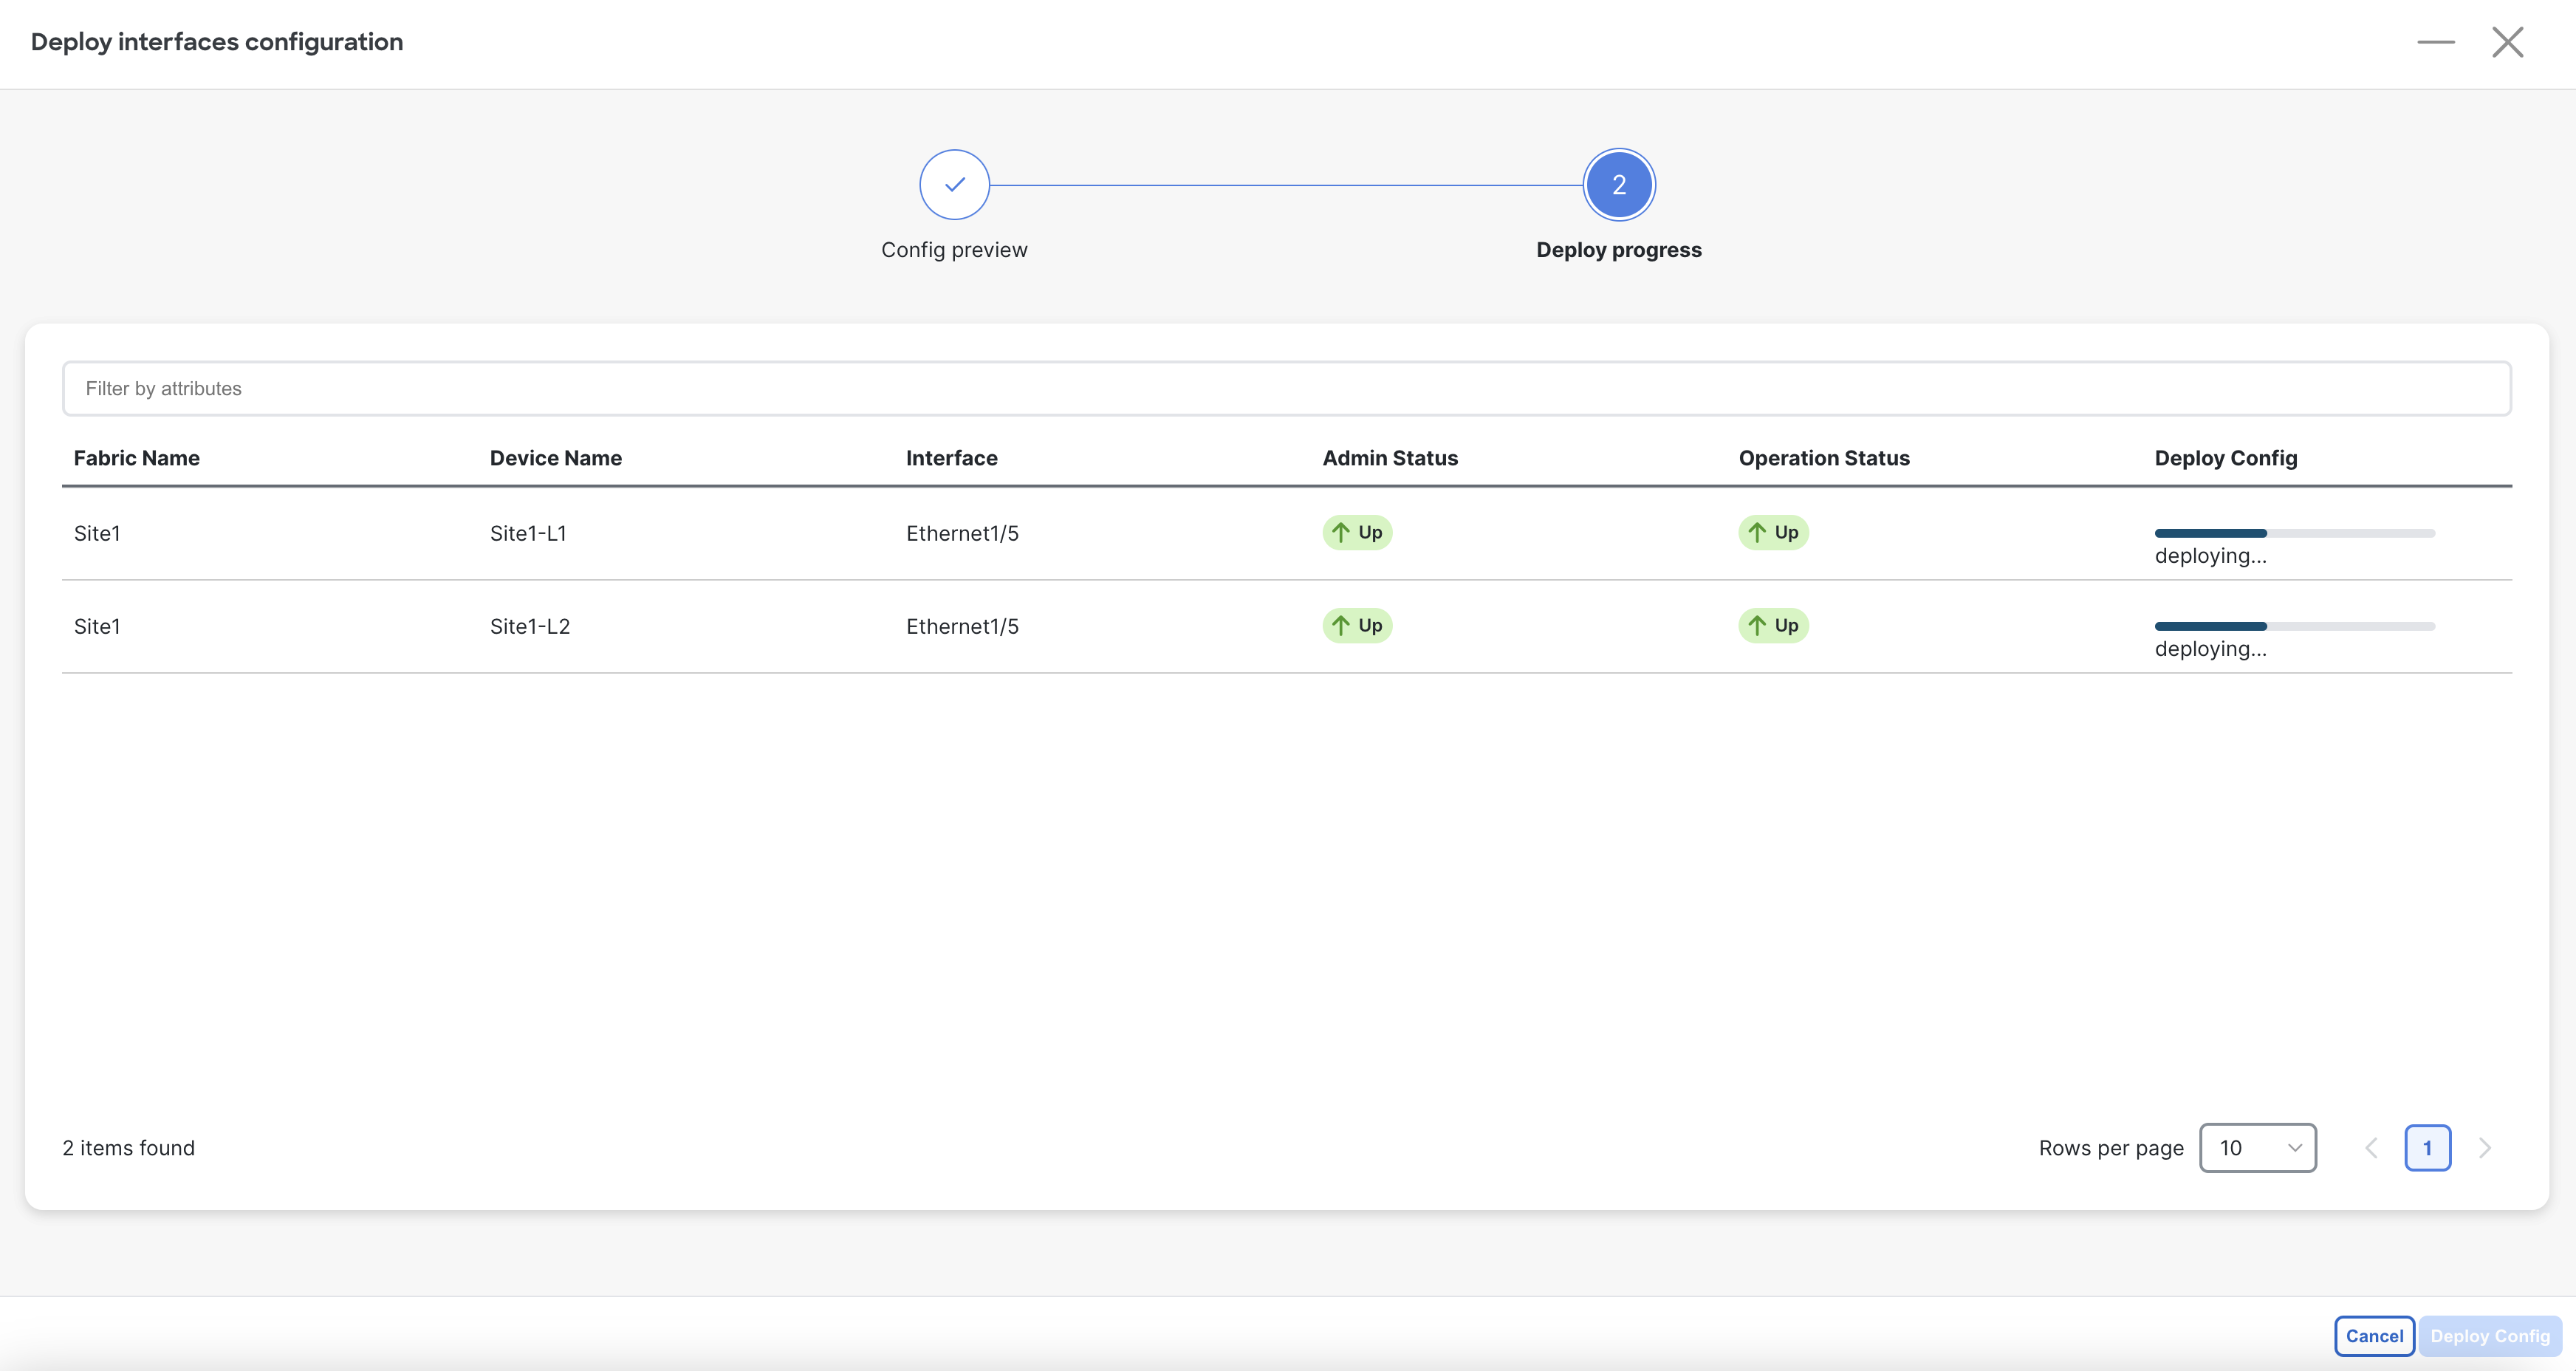
You will see the intended interface configuration starting being deployed for the Ethernet1/5 interface on Site1-L1 and Site2-L1.
Upon the interface configuration being successfully deployed, Nexus Dashboard will redirect you back to Connectivity
Back at the main Interfaces overview, the filter for Ethernet1/5 should still be active. Locate the Ethernet1/5 interfaces for Site1-L1 and Site1-L2 and ensure the Policies column shows int_access_host
You changed the interface policy on Site1-L1 and Site1-L2 from trunk to access host mode using ND's interface management wizard. Instead of SSH'ing into each switch and manually editing interface configurations, ND lets you select multiple switches, apply a policy template, and deploy — all from a single workflow. Templates ensure consistency and eliminate configuration drift across your fabric.
Continue to the next section to create a vPC interface between your Site1-L1 and Site1-L2.
