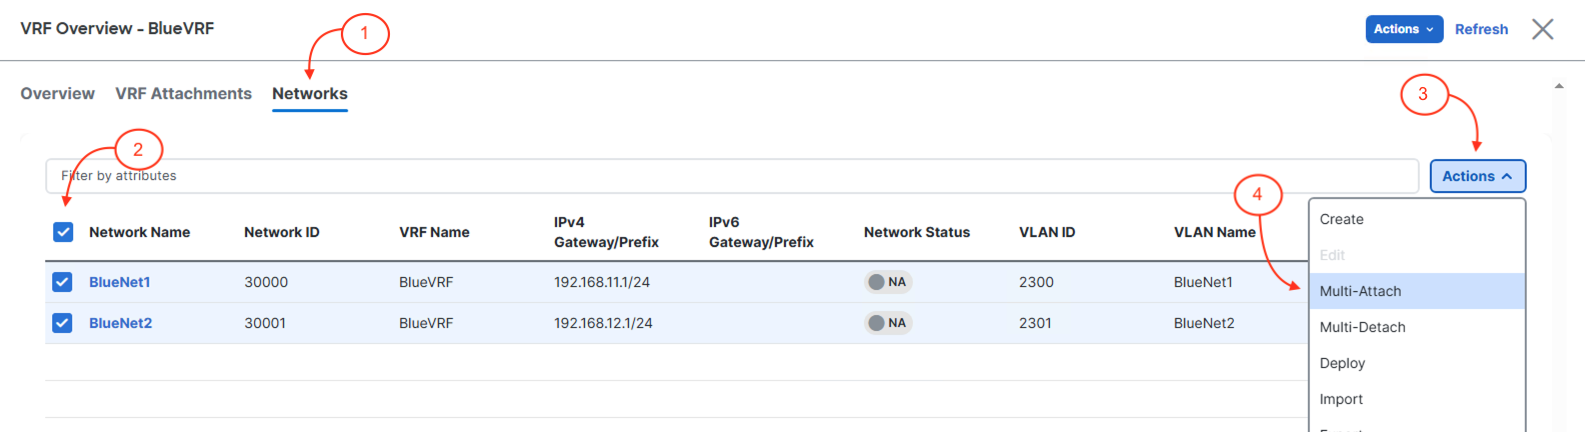
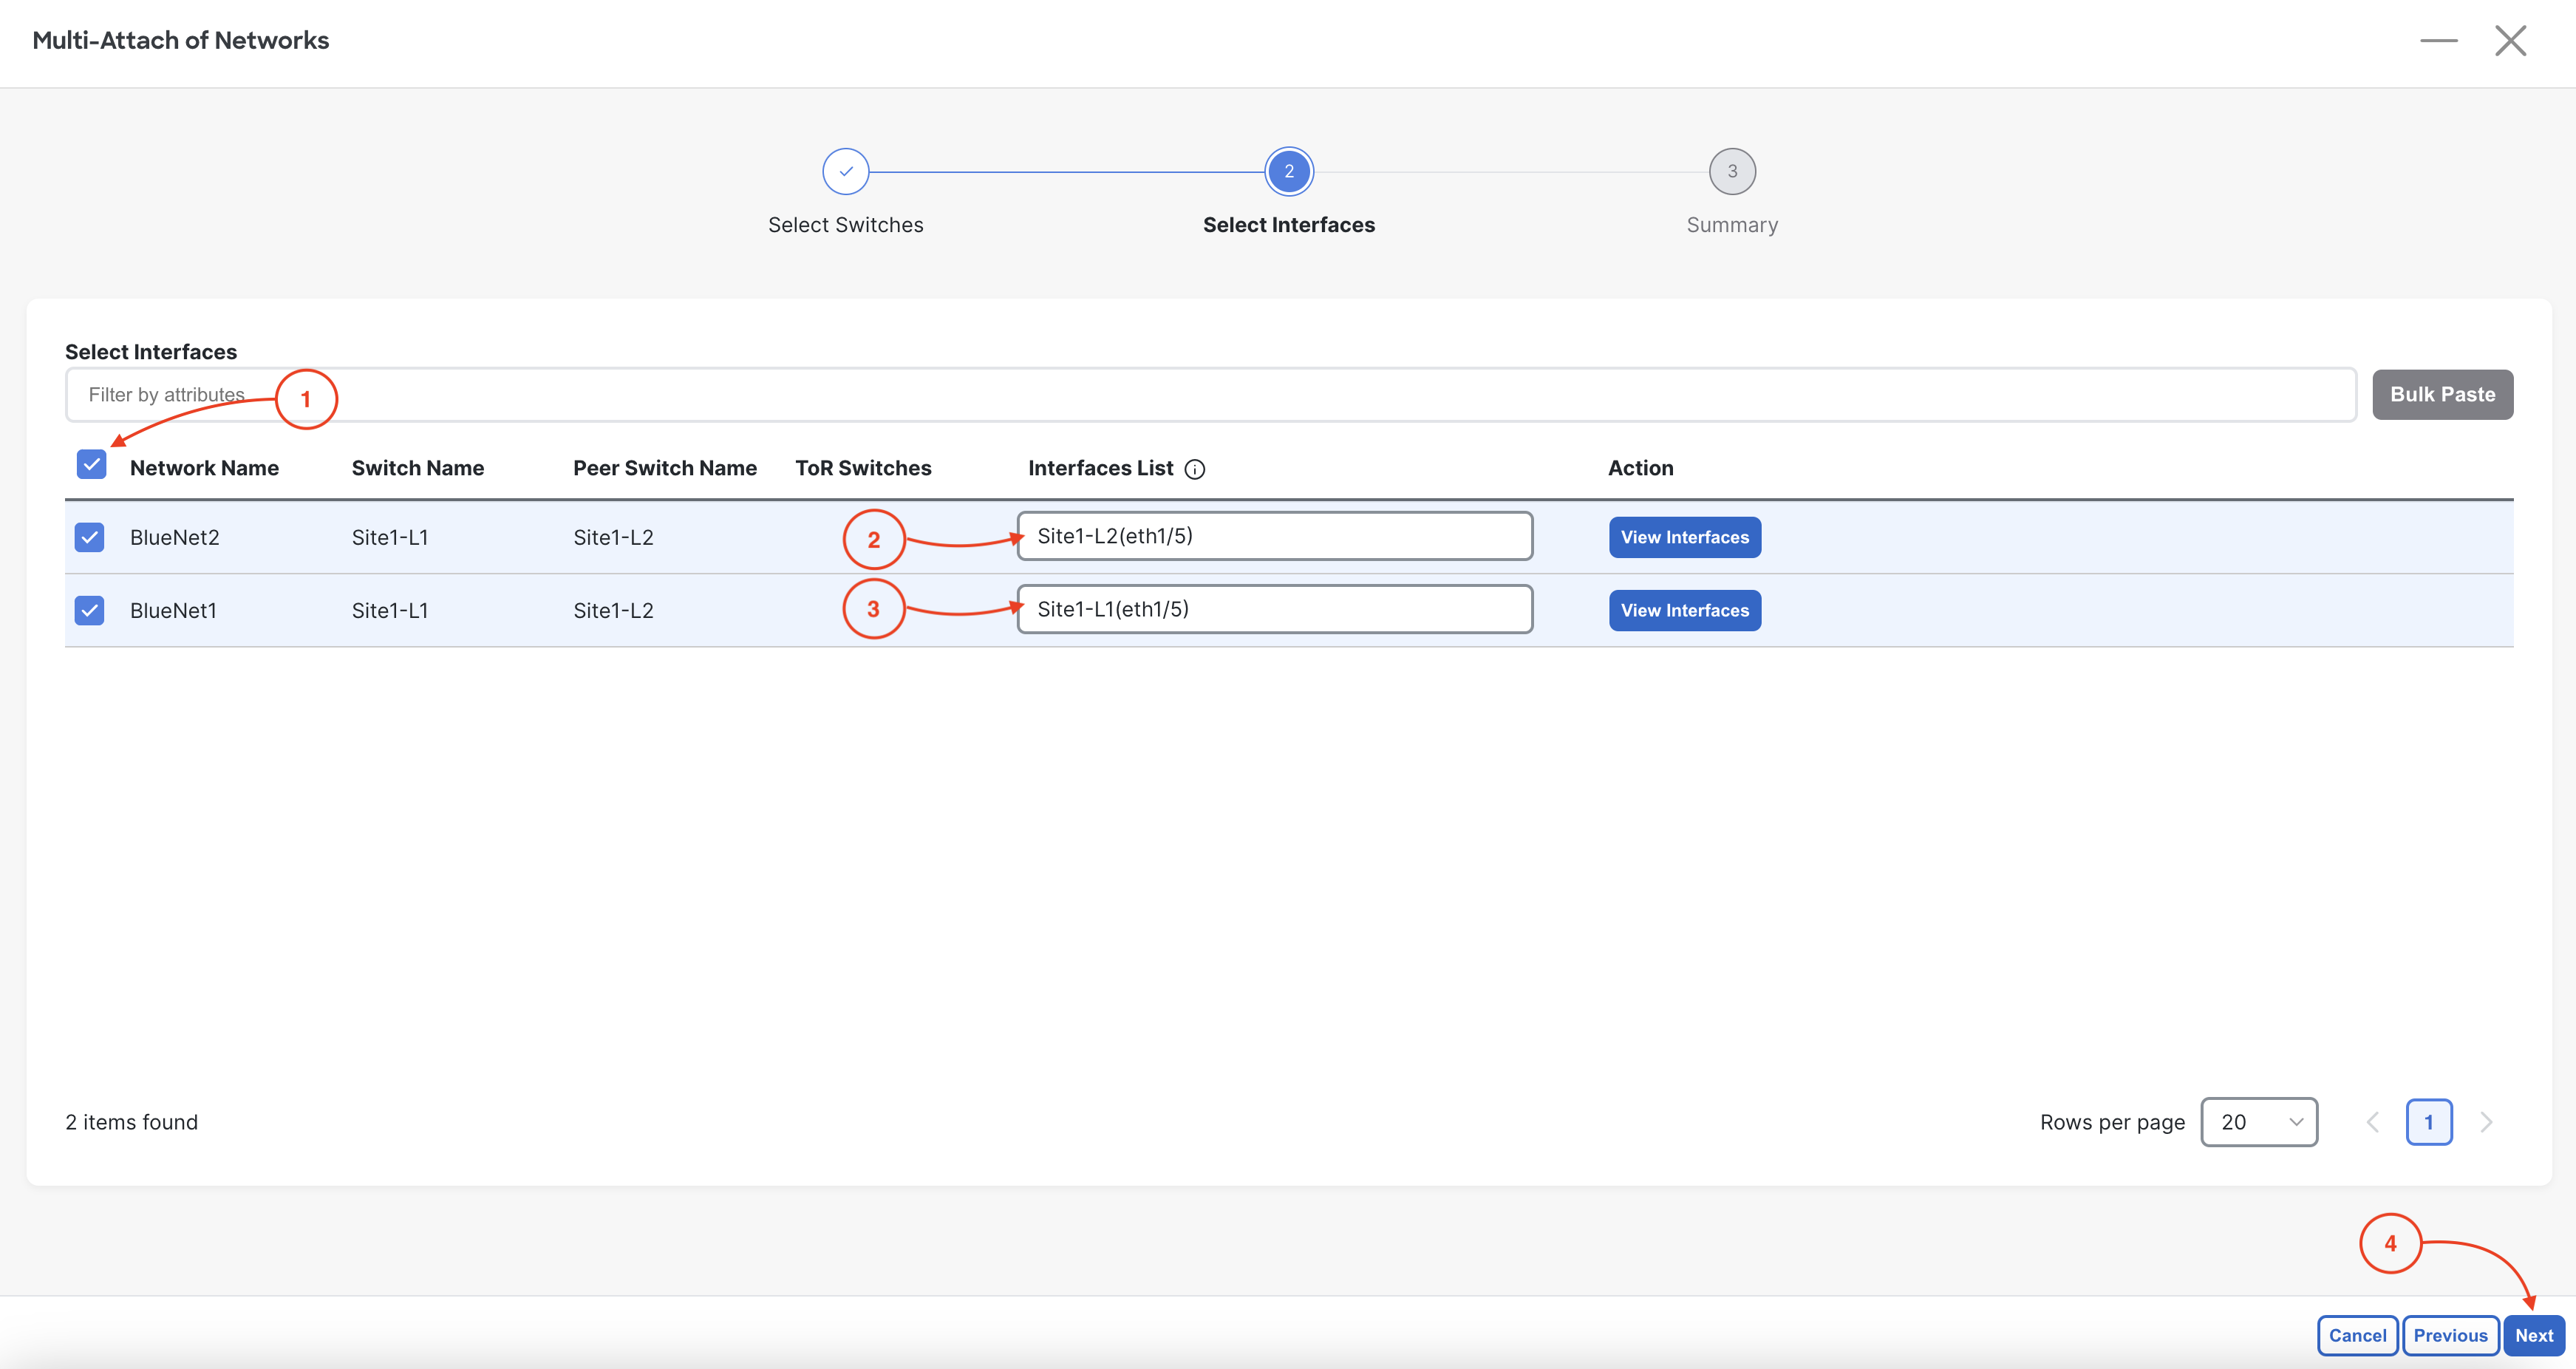
In Nexus Dashboard, you can attach VRFs and Networks to leaf switches independently or combine the workflow as in this lab: first create the VRF, then associate Networks to it, and finally deploy both together, following Cisco best practices. You have already staged your overlay tenant VRF and two host Networks. Now, you need to attach these to the relevant leaf switches—specifically, to the Ethernet1/5 interfaces on Site1-L1 and Site1-L2, where your Linux hosts are connected. During attachment, you select which interfaces (access or trunk) the Networks will use. For this lab, you’ll attach both Networks to Ethernet1/5 on each leaf switch.
In the Edit Network Attachment - Site1 wizard:
Confirm both BlueNet1 and BlueNet2 networks display as deployed:
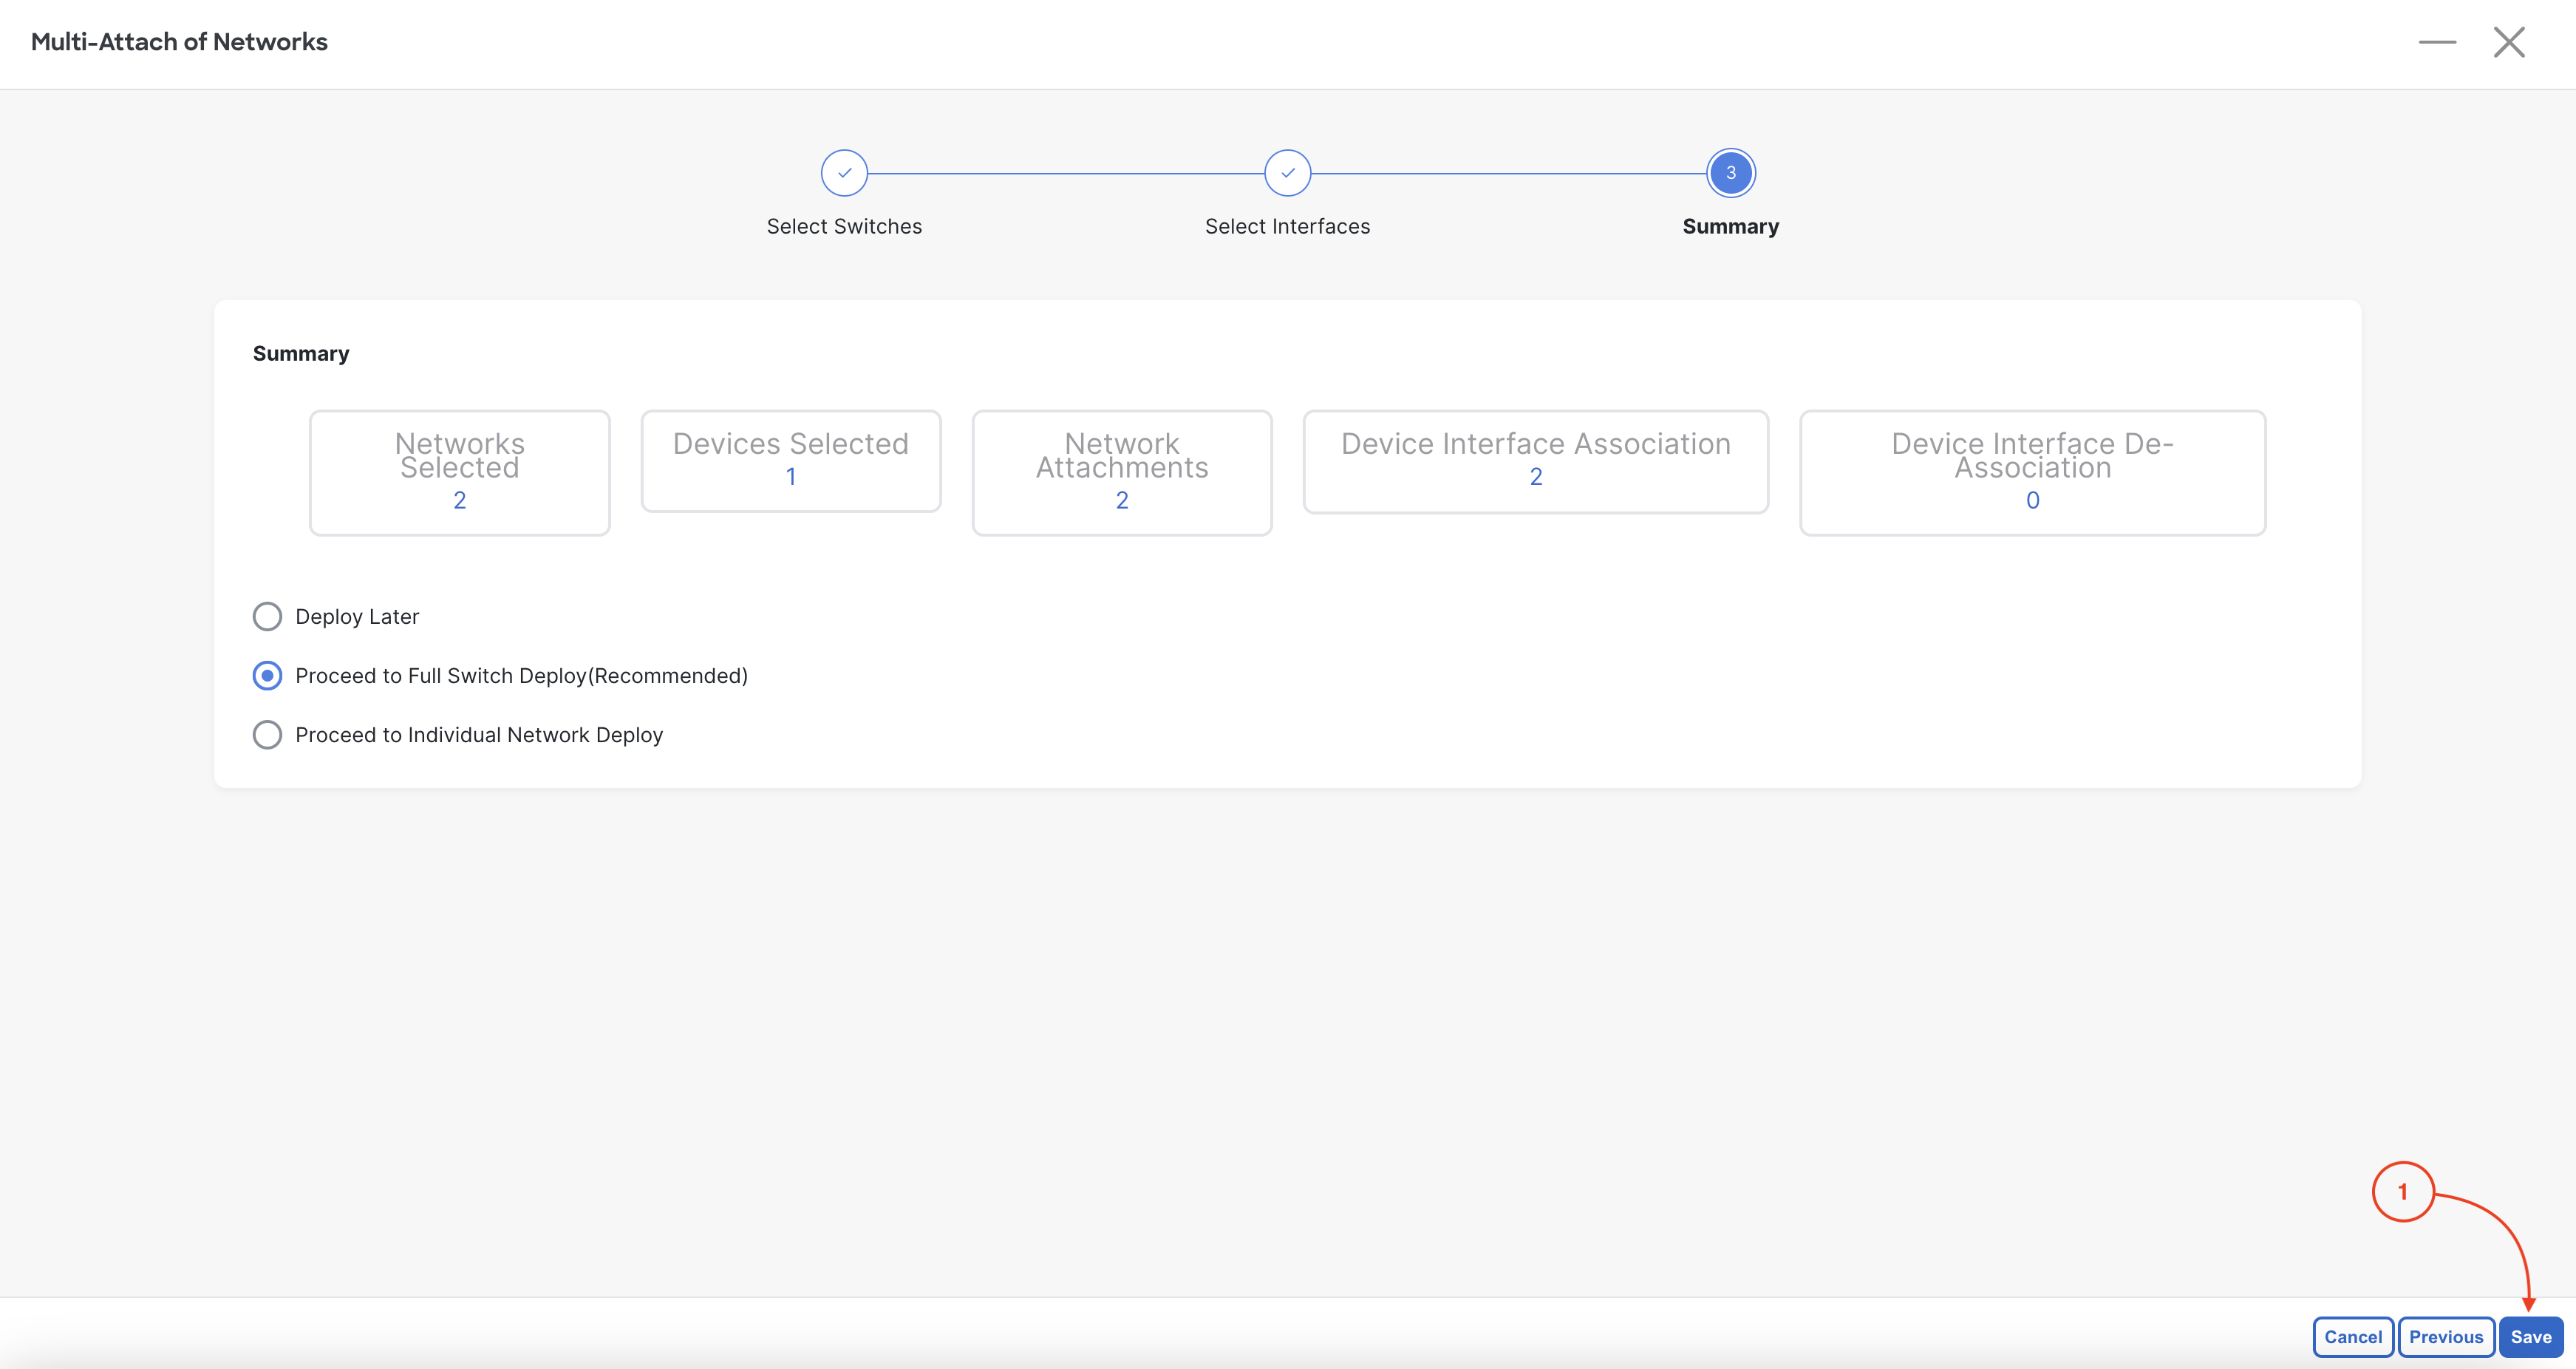
You attached BlueNet1 and BlueNet2 to the appropriate leaf switches and deployed the overlay configuration. Nexus Dashboard's Multi-Attach workflow let you assign networks to specific switches and interfaces in one operation, automatically handling the VRF attachment as well. With a single deploy, ND pushed the complete overlay — VLANs, anycast gateways, EVPN route-targets, NVE VNI members, and interface bindings — to all relevant switches. Your Site1 VXLAN EVPN fabric is now fully operational with end-to-end Layer 2 and Layer 3 connectivity.
