Earlier in the lab, you modified a physical interface and also created a vPC interface. In this section, you will create a Loopback interface that will be eventually advertised into BGP from your external router in the next couple of sections.
Navigate to Interfaces to launch the Create Interface wizard:

In the Create Interface wizard,
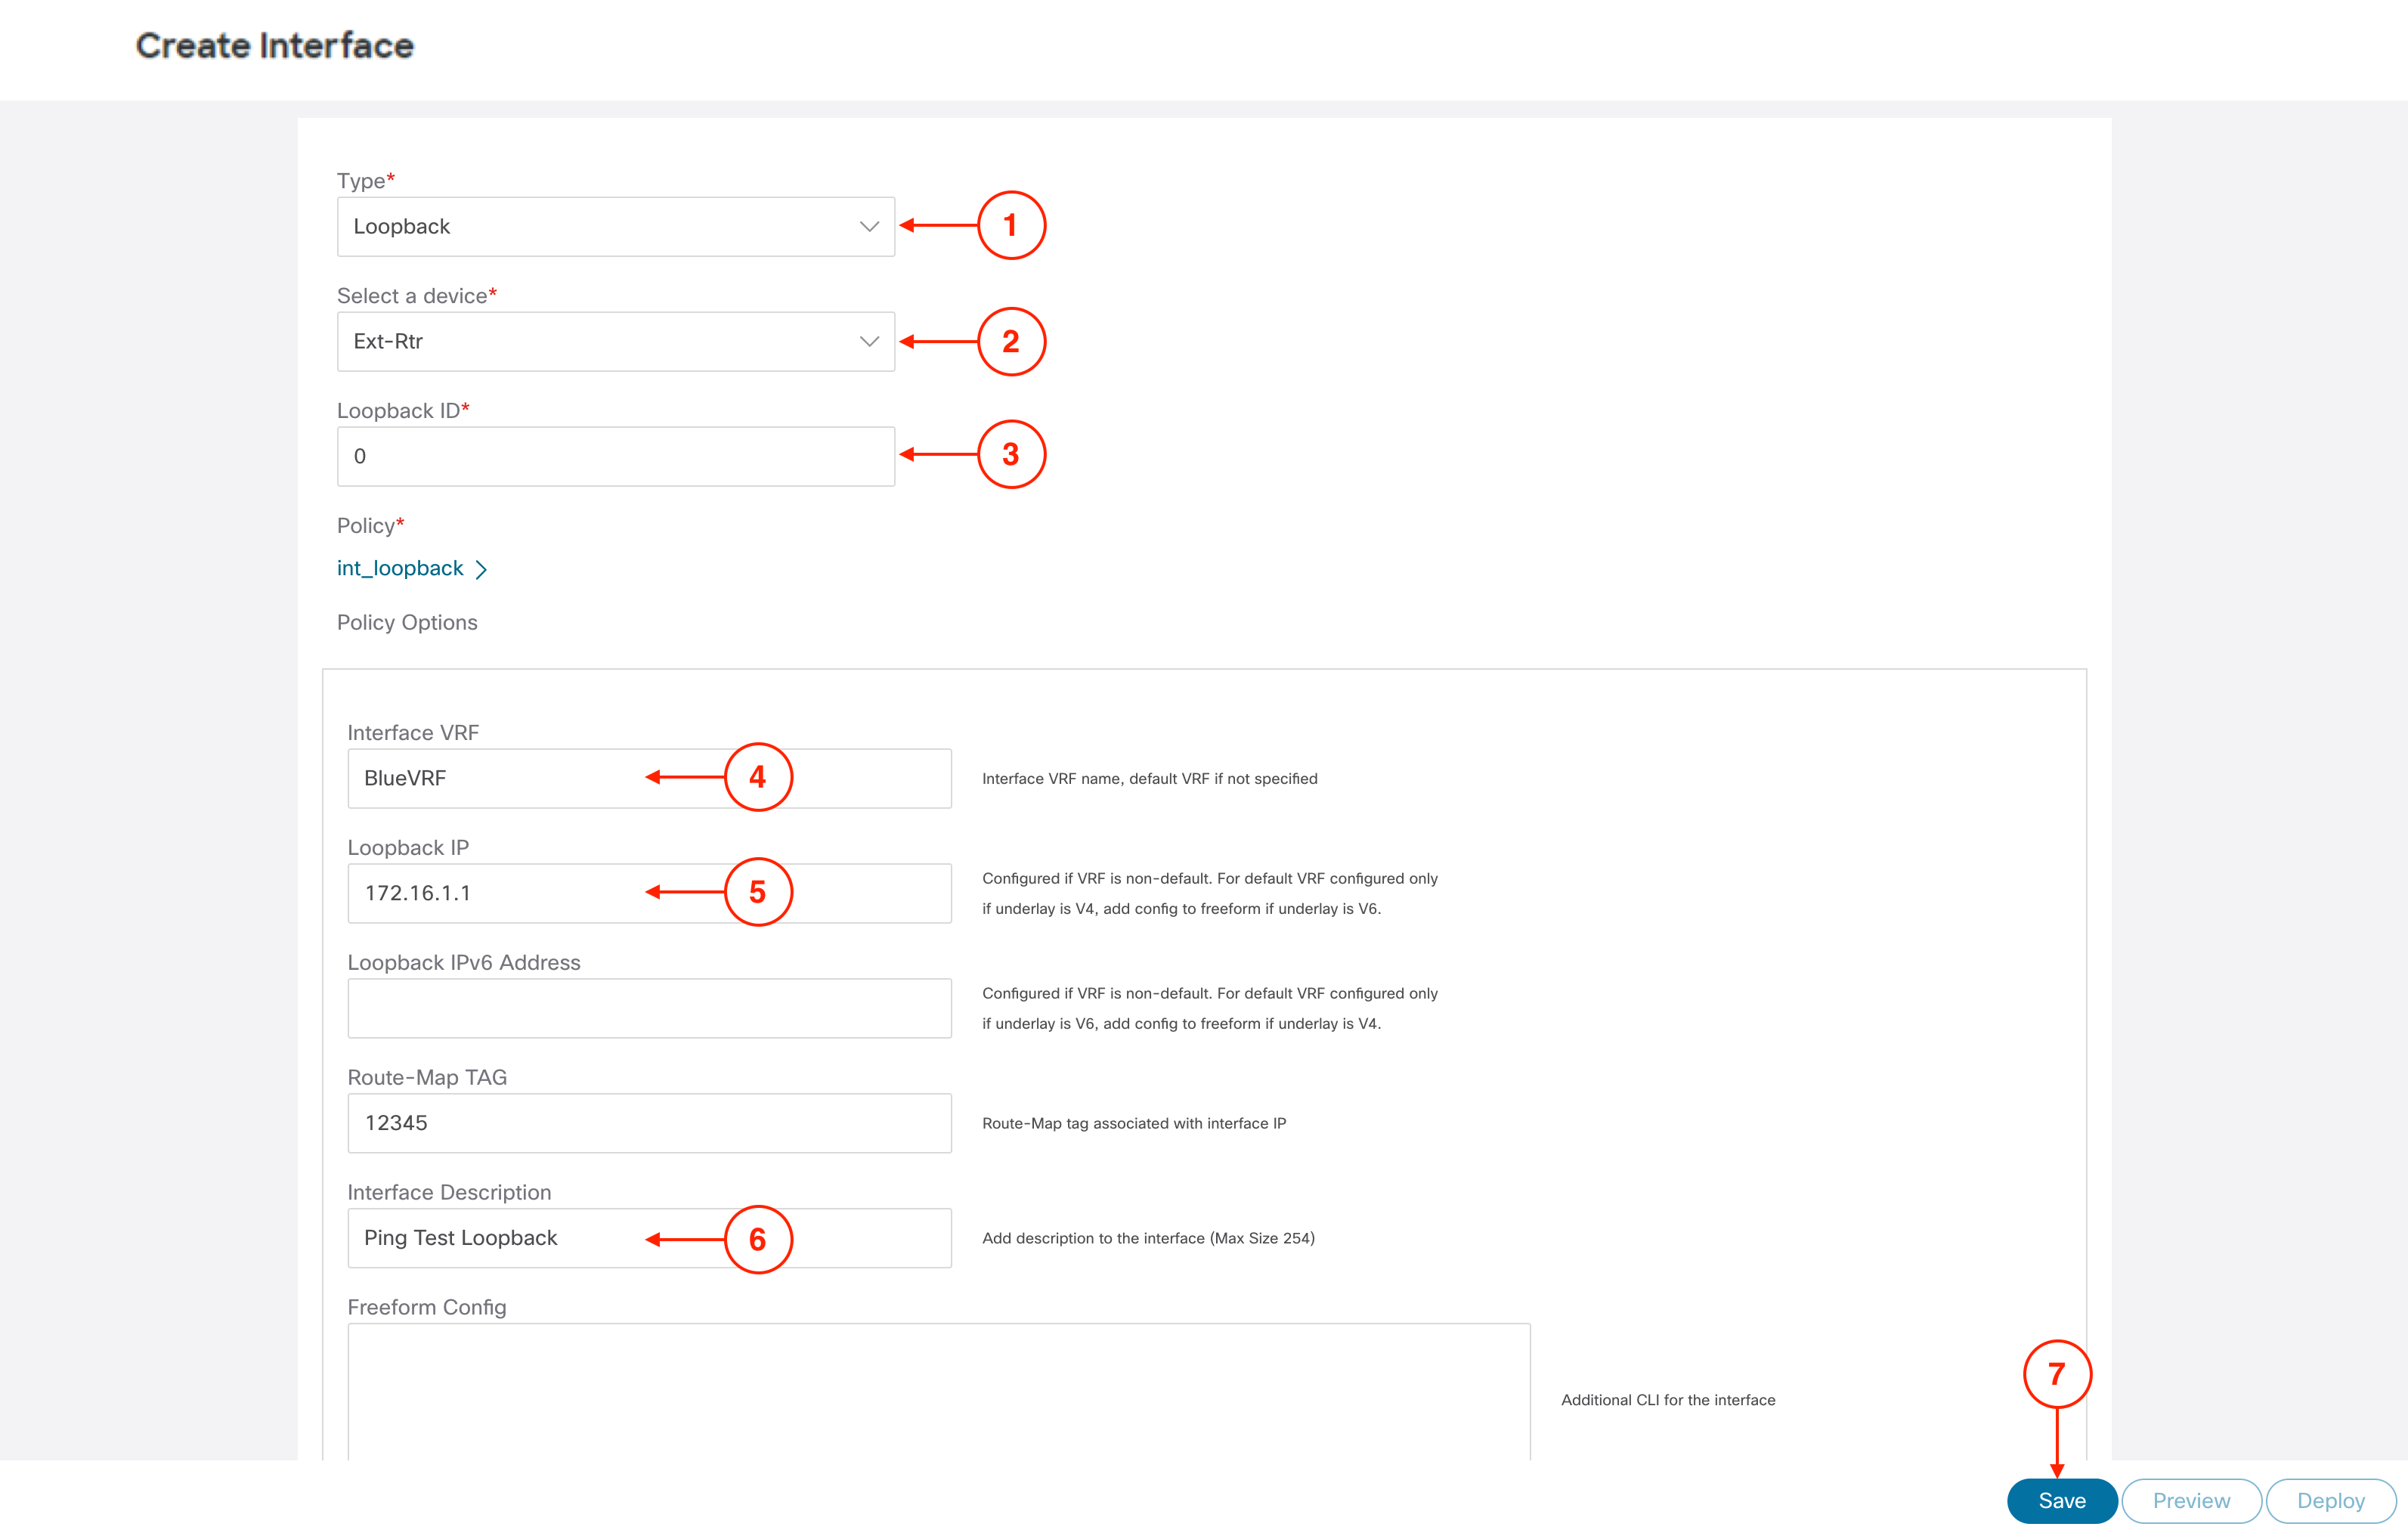

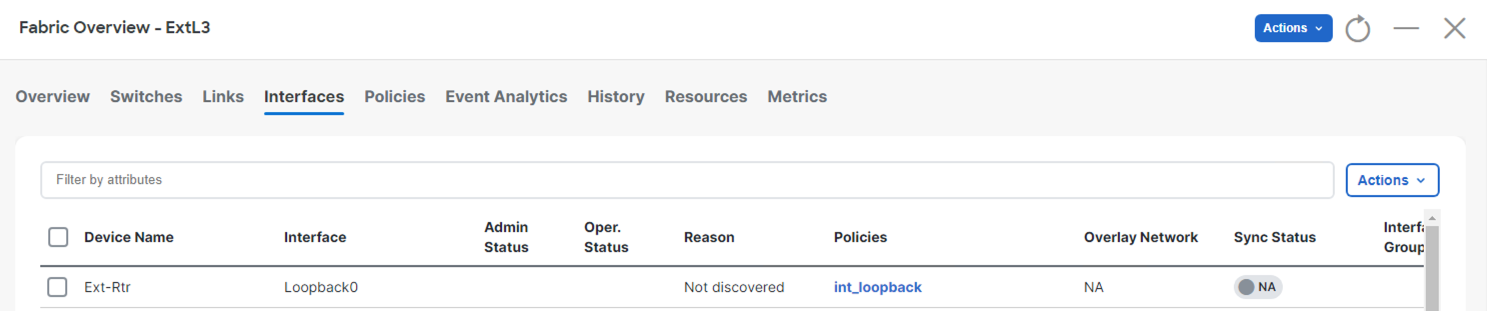
Back at the main Interfaces overview, confirm you see your Loopback0 created. This will be deployed to your Ext-Rtr for advertisement into BGP thus into the VXLAN EVPN fabric as an external route in subsequent sections.
You created a Loopback interface on the external router directly from Nexus Dashboard — no CLI session required. ND's interface management extends beyond VXLAN fabric switches to external devices, giving you a consistent workflow for all interface operations across your entire managed network.
Continue to the next section to create a BGP policy for a network statement that covers the Loopback you just created.
