MSD Fabric
NDFC
  • Introduction
  • ND Basics
  • NDFC Basics
  • NDFC Site1 Fabric (Greenfield)
  • Verify Site1 Fabric
  • NDFC Site2 Fabric (Brownfield)
  • Verify Site2 Fabric
  • NDFC External L3
  • Verify ExtL3
  • NDFC ISN
  • NDFC Multisite
  • Verify MSD
  • Ansible NDFC

The same Nexus Dashboard Fabric Controller can manage multiple VXLAN BGP EVPN fabrics while also offering easy provisioning and management of Layer-2 and Layer-3 DCI underlay and overlay configuration among these fabrics using a special construct called a Multi-Site Domain (MSD) fabric.

You can set up a Multi-Site or a VRF-lite IFC by manually configuring the links for the border devices in the VXLAN fabric or by using an automatic Deploy Border Gateway Method or VRF Lite IFC Deploy Method. If you are configuring the links manually for the border devices, we recommend using the Core Router role to set up a Multi-Site eBGP underlay from a Border Gateway device to a Core Router and the Edge Router role to set up a VRF-lite Inter-Fabric Connection (IFC) from a Border device to an Edge device.

The main functional component of the EVPN Multi-Site architecture is the border gateway, or BGW. BGWs separate the fabric-side (site-internal fabric) from the network that interconnects the sites (site-external DCI) and mask the site-internal VTEPs.

Step 1 - Exit ISN Fabric

  1. In the top right corner, click the to close your ISN fabric

Step 2 - Launch Create Fabric Wizard

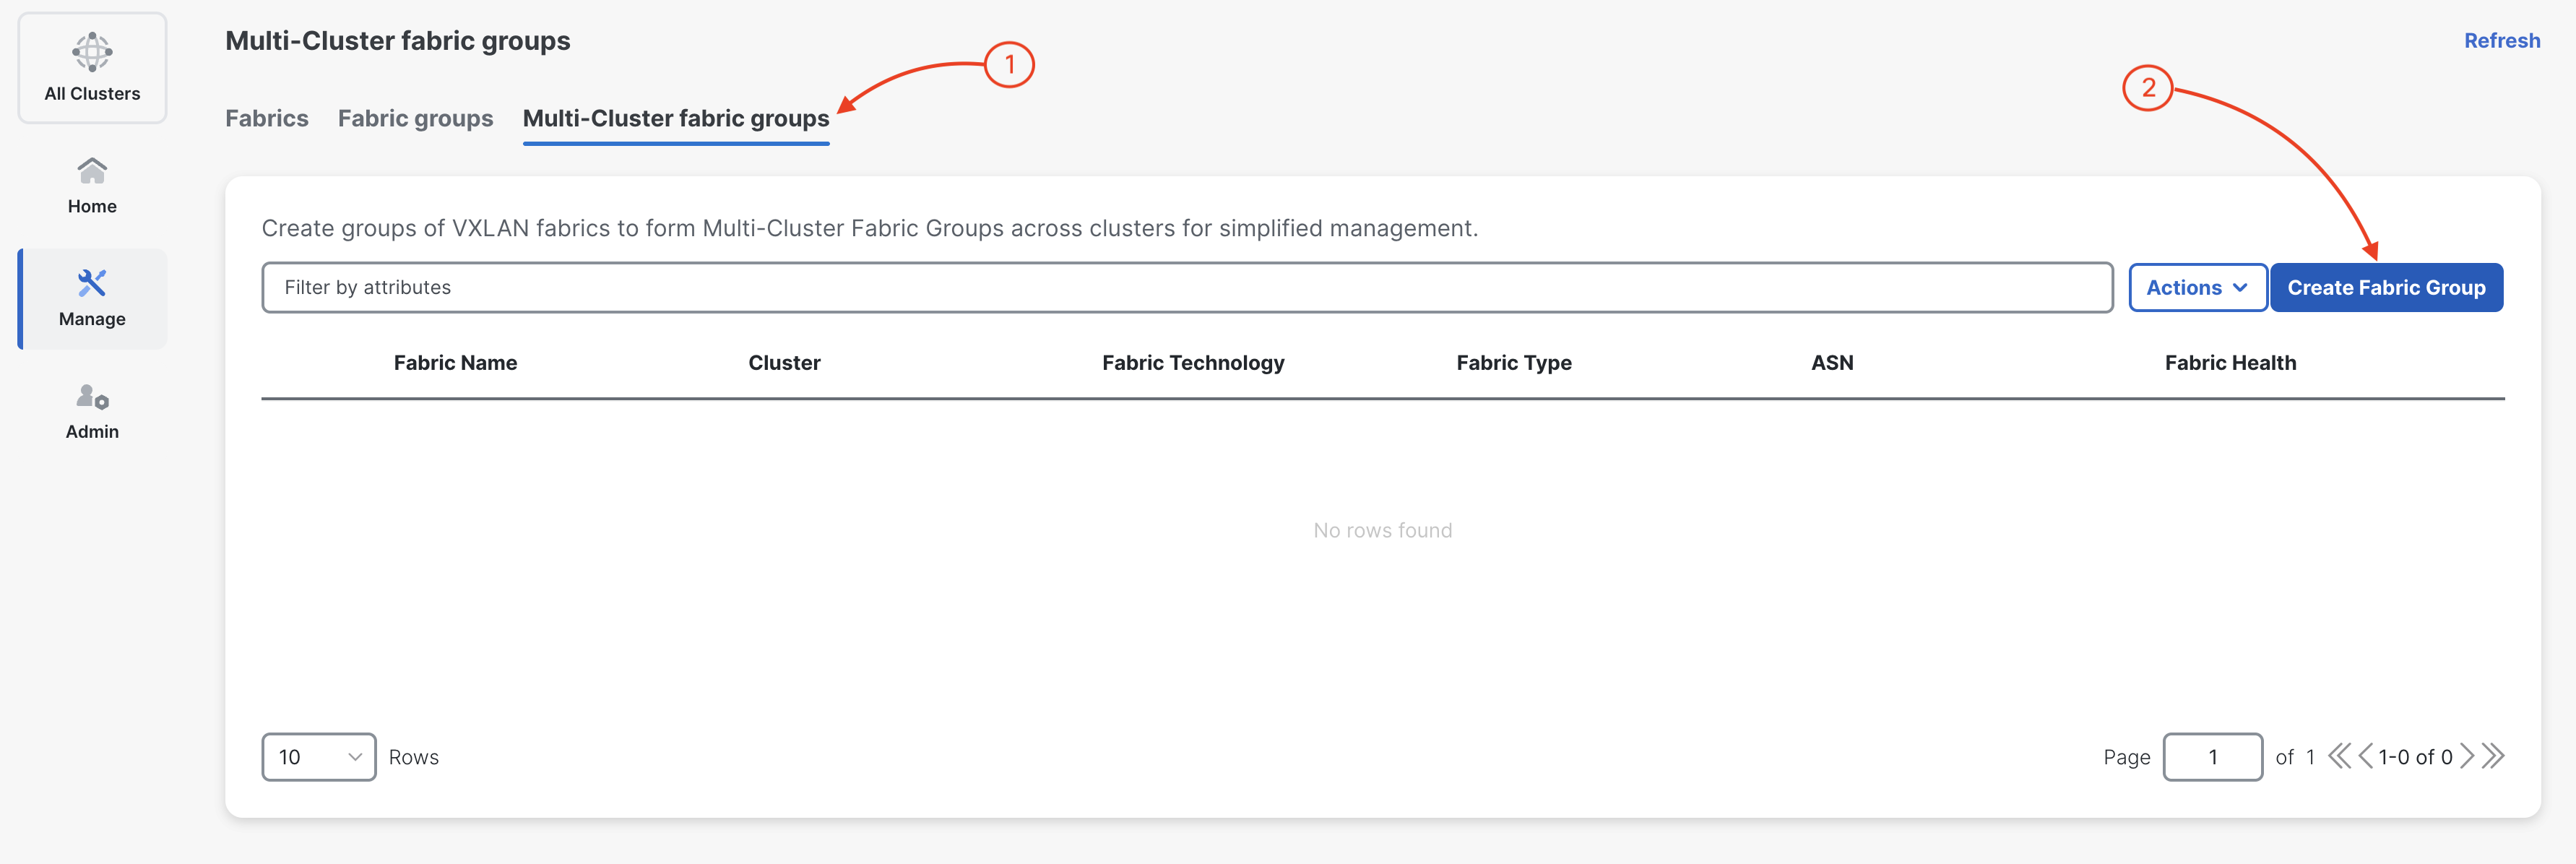
In the Fabrics pane, you should now see your Site1, Site2, ExtL3, and ISN fabrics present. Navigate to the far right of the pane and locate Actions:

  1. Click Actions
  2. Then, click Create Fabric

Step 3 - Name Your MultiSite Domain Fabric

In the Create Fabrics popup wizard:

  1. Name the fabric: MSD
  2. Then, click Choose Fabric

Step 4 - Select Fabric Template Type

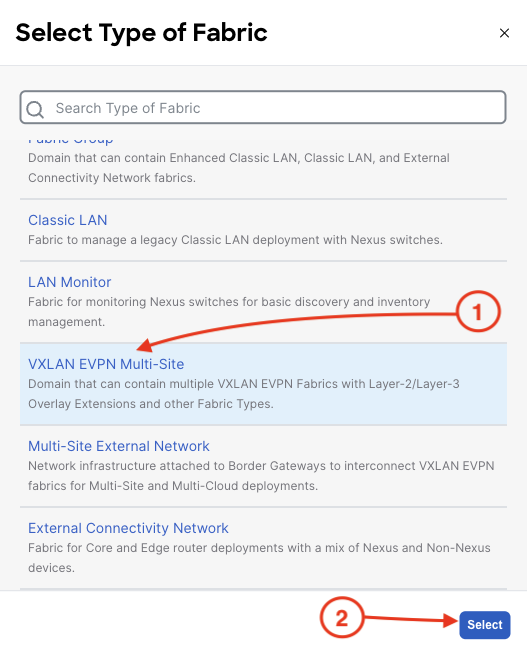
The fabric type will be a new type you have not worked with yet; VXLAN EVPN Multi-Site. In the Select Type of Fabric popup:

  1. Click VXLAN EVPN Multi-Site
  2. Then click Select

Step 5 - Define General Parameters

The first section is General Parameters where you define the Layer 2 and Layer 3 VXLAN VNIs for extending Layer 2 and Layer 3 connectivity and the corresponding templates required. The L2VNI and L3VNI ranges must align and encompass the ranges used in the one or more fabrics that will be imported into your MultiSite Domain (MSD). When you created your Site1 and Site2 fabrics, these ranges were what was used. Additionally, the Anycast Gateway MAC address used in both your Site1 and Site2 fabrics is defined. These must all be the same. You can leave the default for the lab as that is what was previously used in your Site1 Greenfield deployment and Brownfield import.
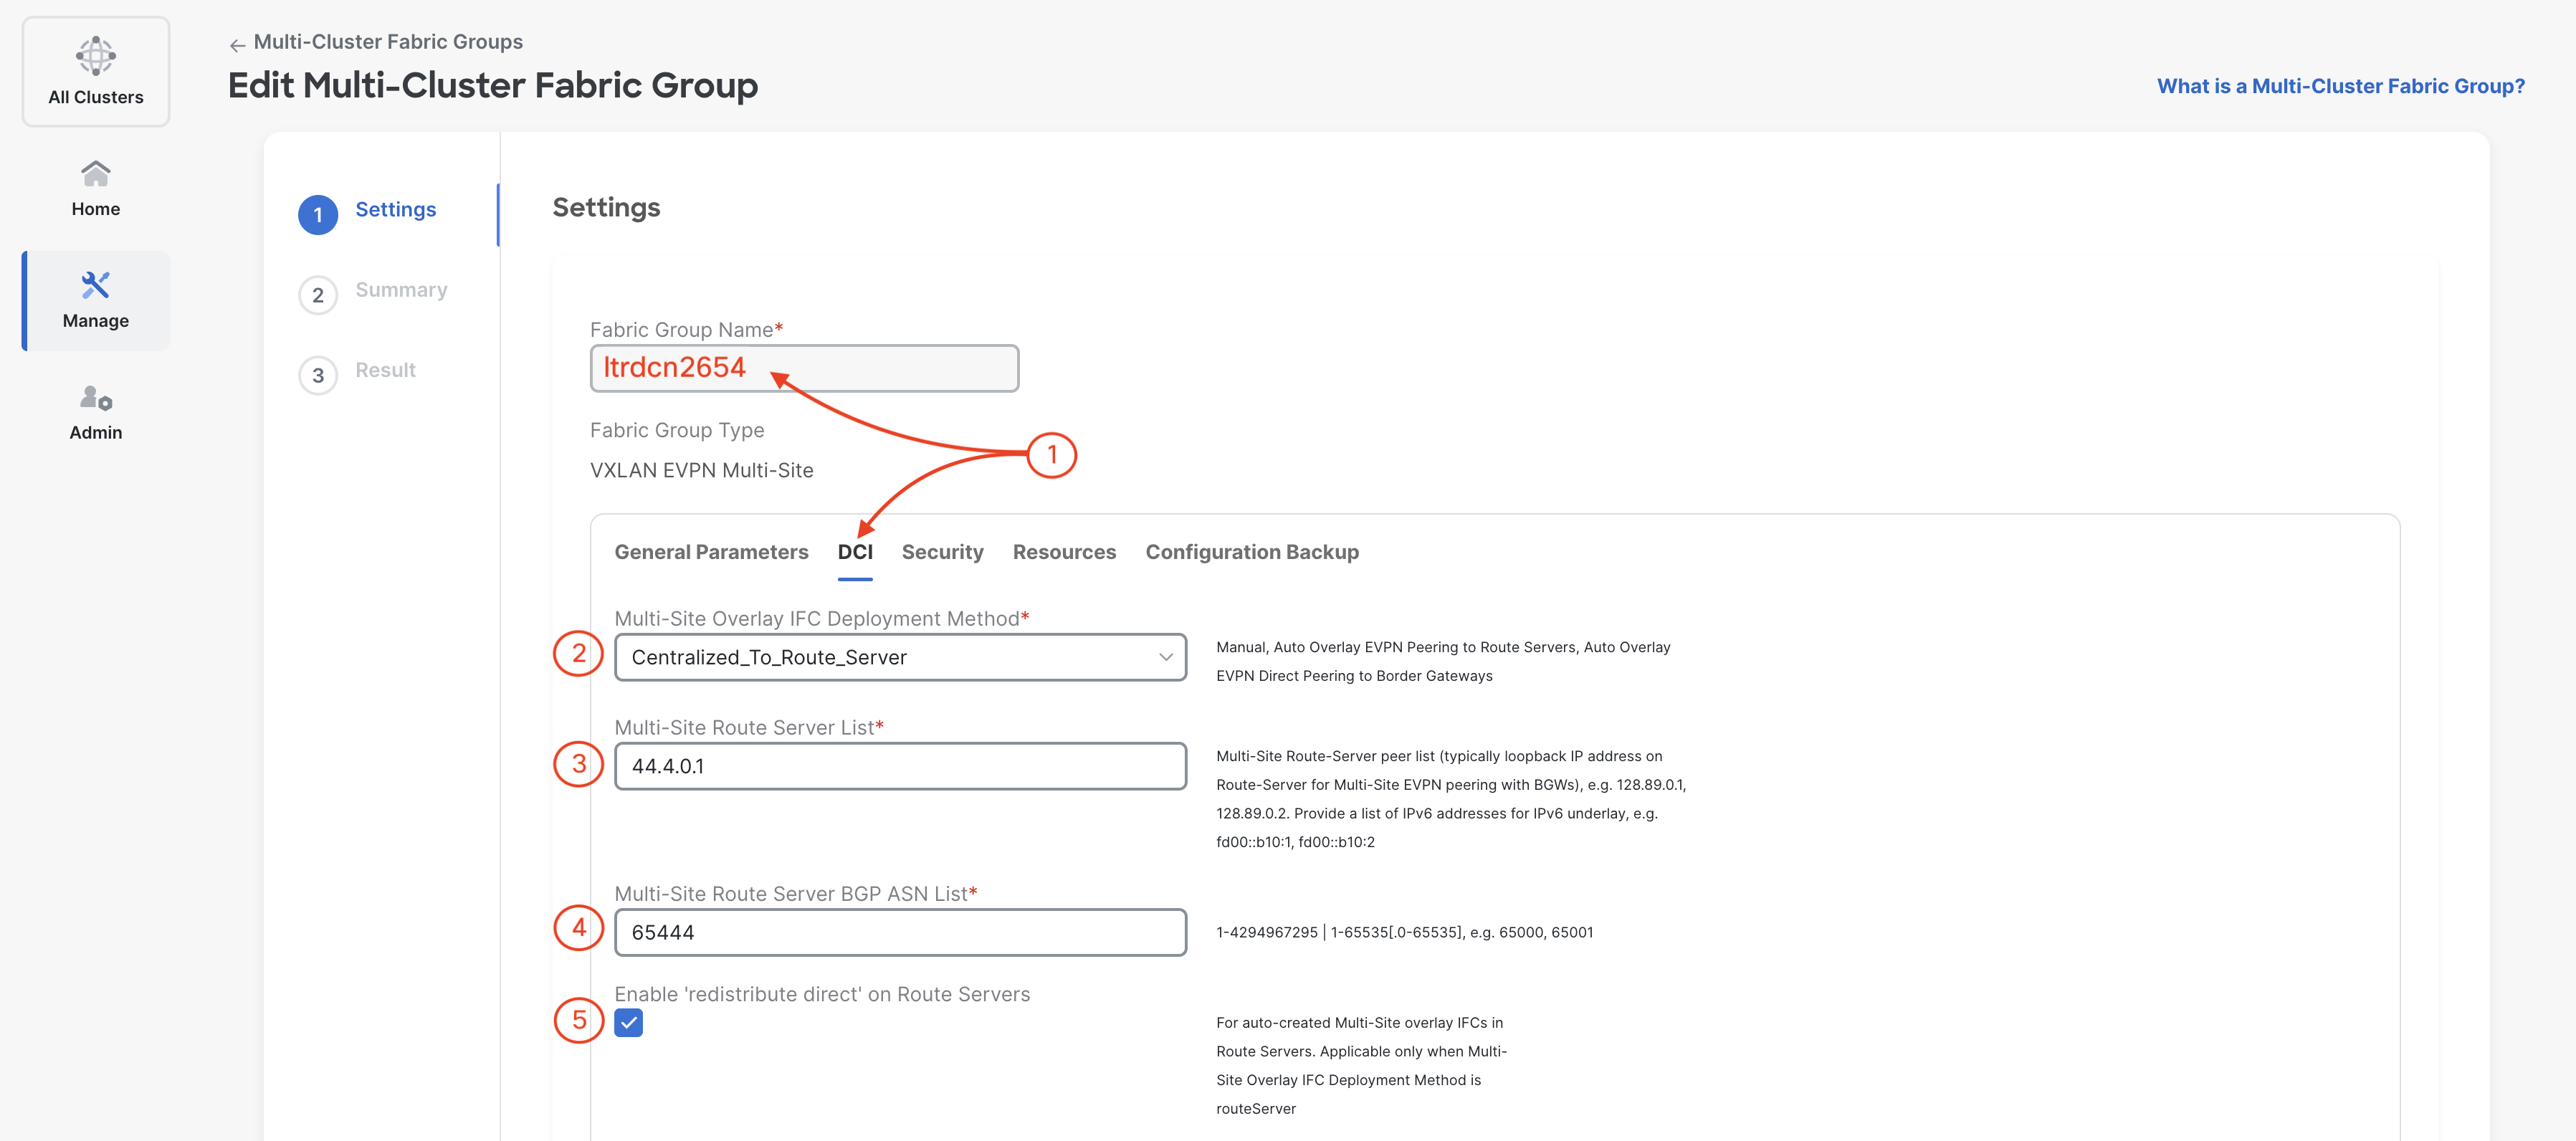
Step 6 - Define DCI Parameters

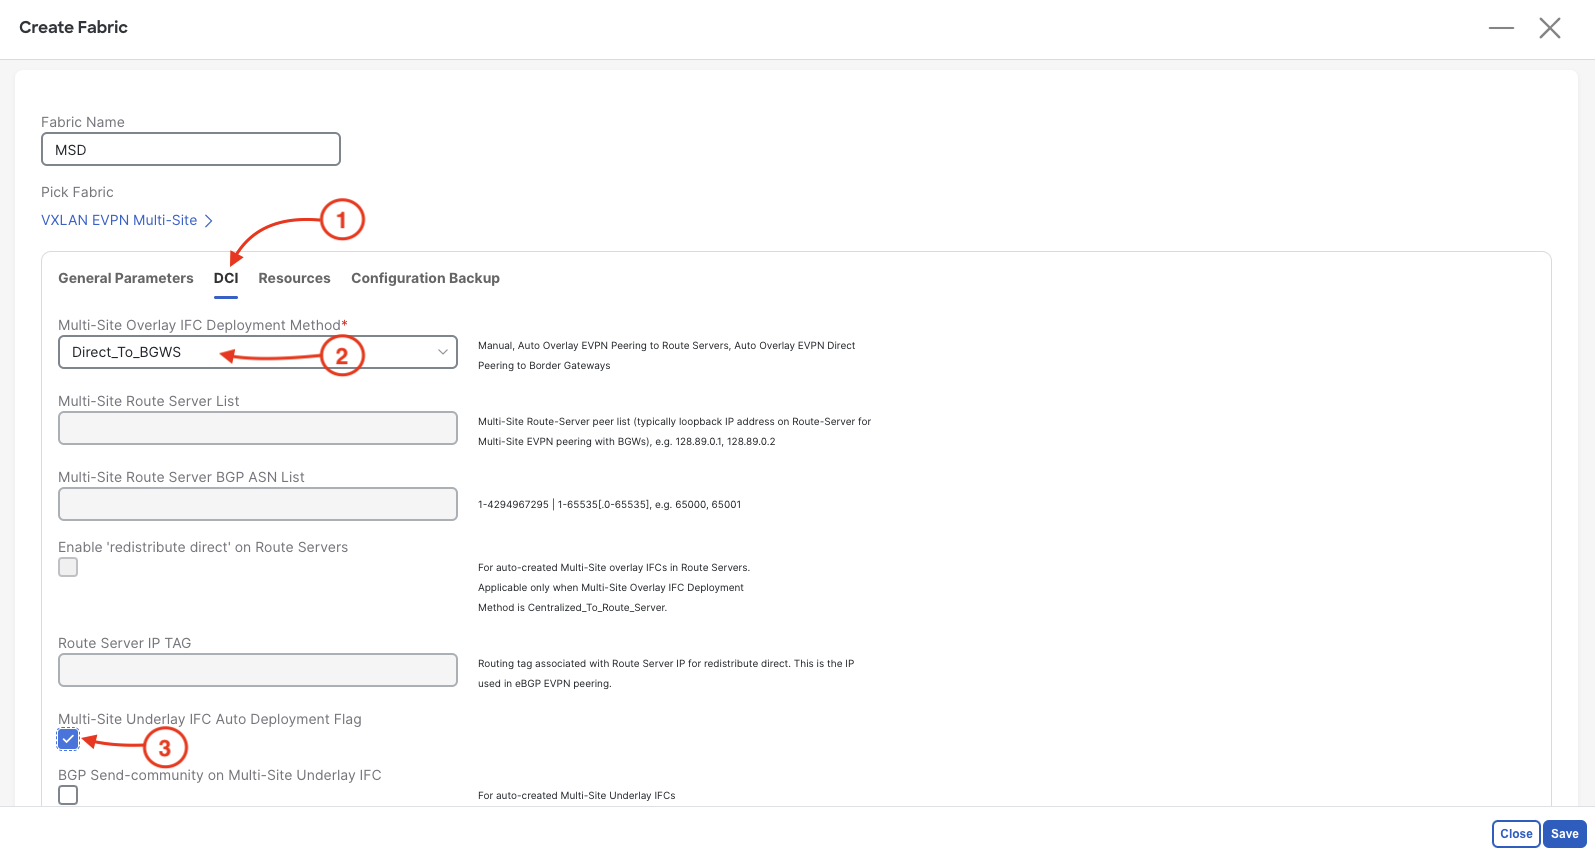
The next section is DCI parameters where specify how the DCI is to be configured. The MultiSite overlay Inter-Fabric Connections (IFCs) can be deployed manually, using a route server, or directly to the border gateways. In this lab, you will deploy the MultiSite overlay IFCs directly to your border gateways in your Site1 and Site2 fabrics. Additionally, you will enable to automatic deployment of the underlay configuration for the IFCs to your Core-Rtr so that you do not have to perform that operation manually.

  1. In the Multi-Site Overlay IFC Deployment Method dropdown menu, select Direct_To_BGWS
  2. Check the checkbox for Multi-Site Underlay IFC Auto Deployment Flag

Step 7 - Define Resources Parameters

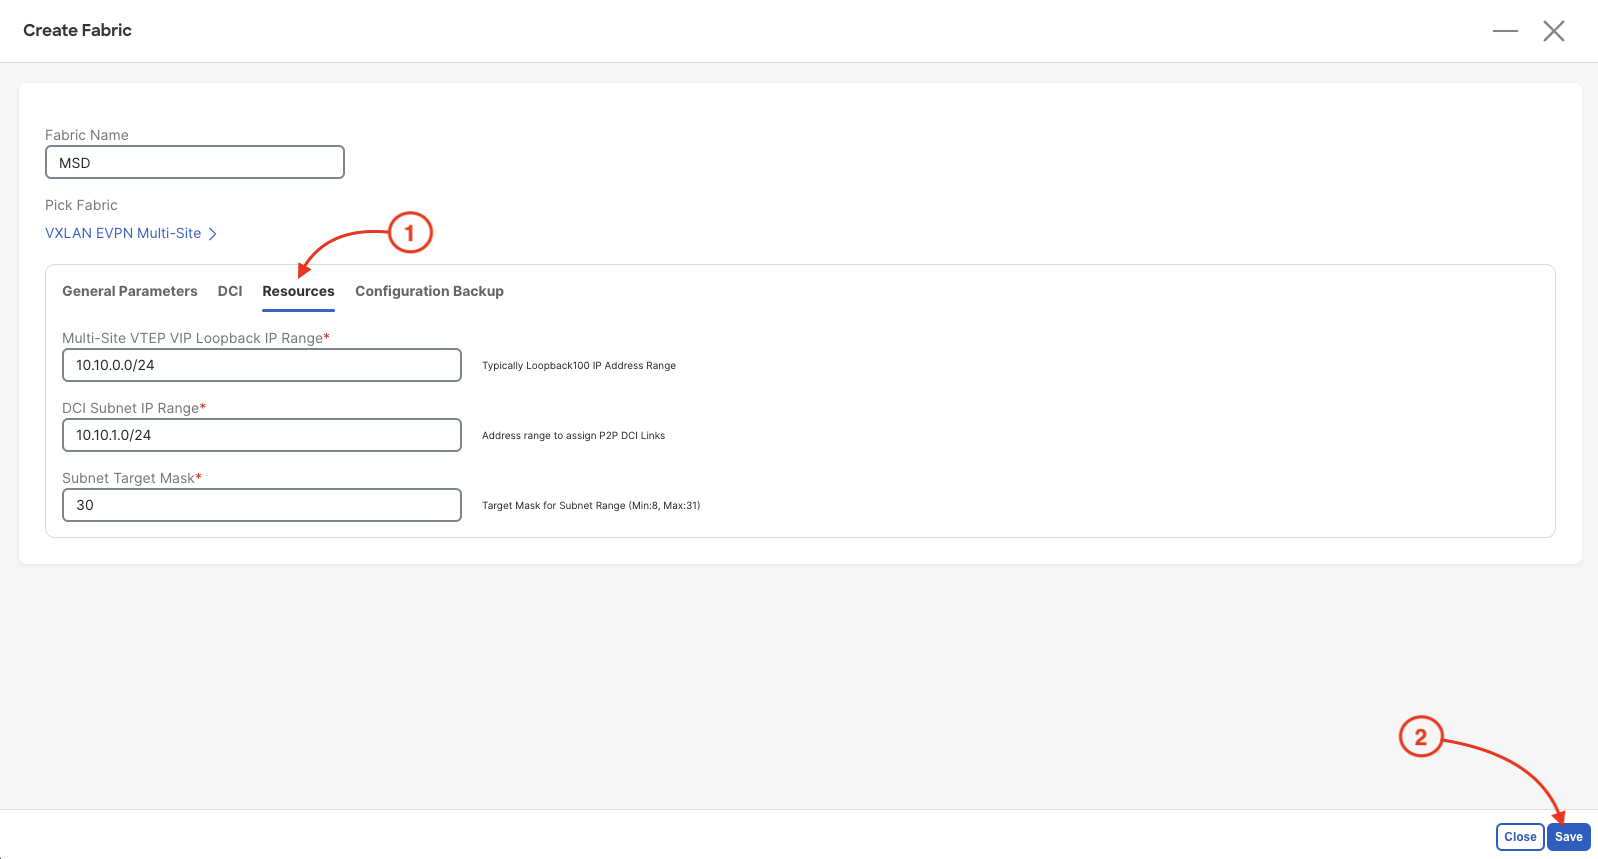
The last main section is the Resources parameters where you define the subnet scopes for IFCs and routing loopbacks deployed to your border gateways. The default subnets will be used.

  1. Click Resources
  2. Click Save

Step 8 - View MSD Fabric Sidebar

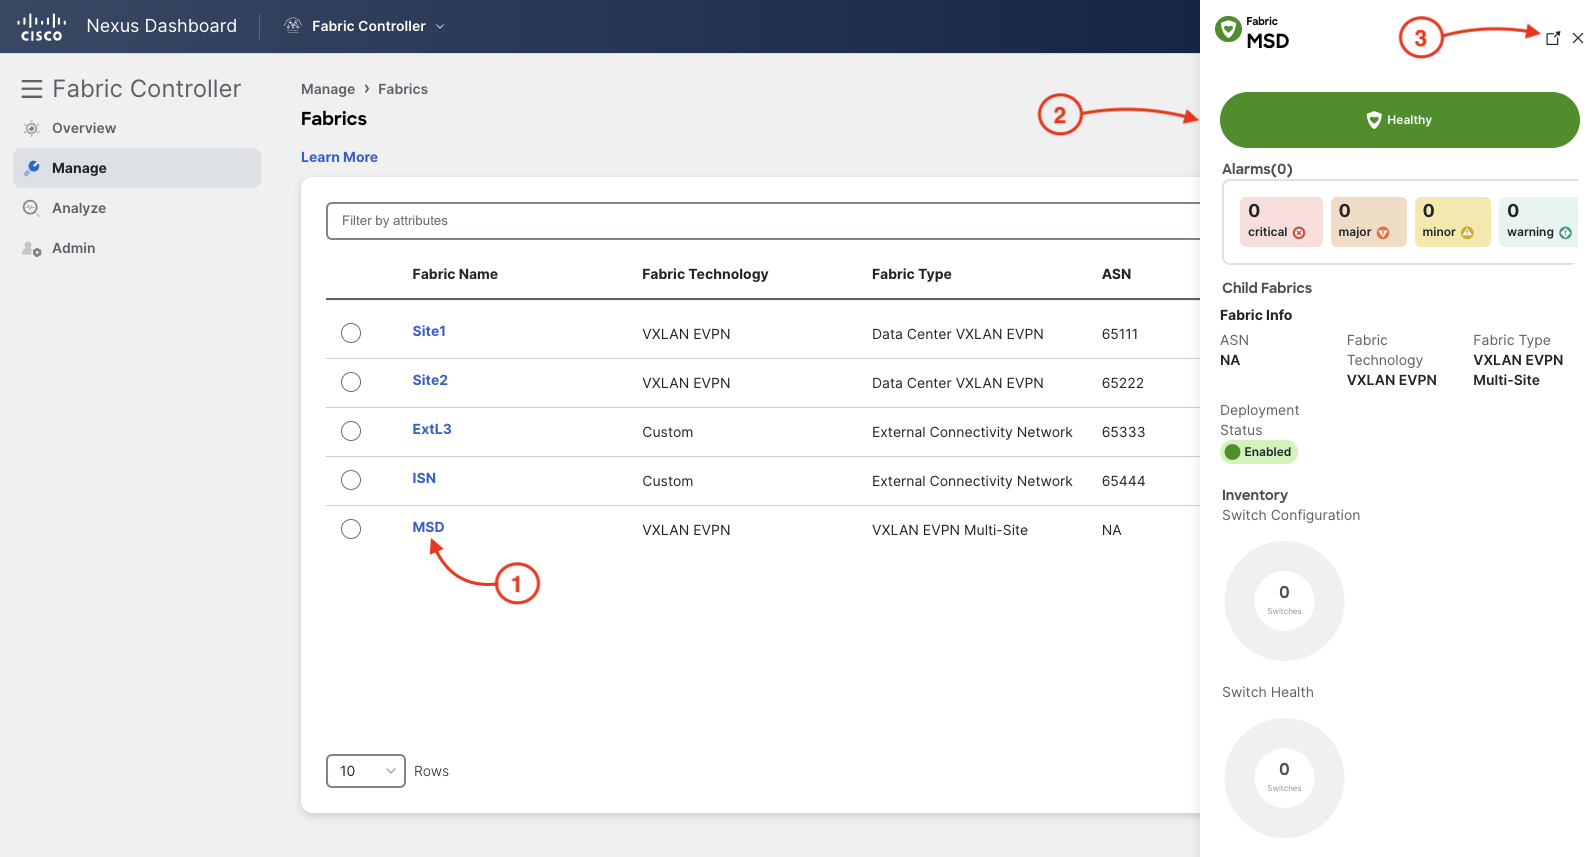
In addition to the Fabric Health column, you can click on any fabric listed to get a quick view sidebar that pops out on the right side of your screen with details about the fabric:

  1. Click MSD
  2. A sidebar should pop out on the right with more high-level information. This will populate more as you progress throughout the lab.
  3. To navigate to your MSD fabric, click the expand button . You could also just double click the Fabric Name MSD to navigate to the fabric

Step 9 - View MSD Fabric Dashboard

Once clicking the expand button in the fabric popout sidebar or double-clicking the MSD fabric name, you are presented with the overall MultiSite dashboard overview. This dashboard includes health pie charts for all fabrics that are added to the MultiSite Domain with combined pie chart views for also configuration health, breakdown in role types, and versions. The lower portion of the dashboard should look familiar with the VXLAN, Networks/VRFs and Extended Networks/VRFs pie charts information as that looks identical to your Site1 and Site2 fabric's dashboards. Here this data will be aggregated. You will bring this dashboard to life in the next section when you import your Site1 and Site2 fabrics!


Continue to the next section to import your Site1 and Site2 fabrics into your MSD fabric. You will also import your ISN fabric for establishing the underlay and overlay IFCs between your Site1 and Site2 fabrics and then extending L2/L3 VNIs.