In Nexus Dashboard, "Networks" is where you define Layer-2 VNIs (L2VNIs) and associate them with VLANs to create Layer-2 segments (bridge domains) over your VXLAN fabric. L2VNIs keep traffic segmented, preventing Layer-2 traffic from crossing VNI boundaries. If you need routing between different VNIs, you must associate the networks with a Layer-3 VNI (L3VNI) and a VRF. For routing, you can also configure an Anycast Gateway (SVI) so the same gateway IP exists on all necessary leaf switches. If routing isn’t needed, the L2VNI can remain Layer-2 only. In this lab, you’ll define two networks for inter-VXLAN routing, associating them with the L3VNI VRF created earlier.

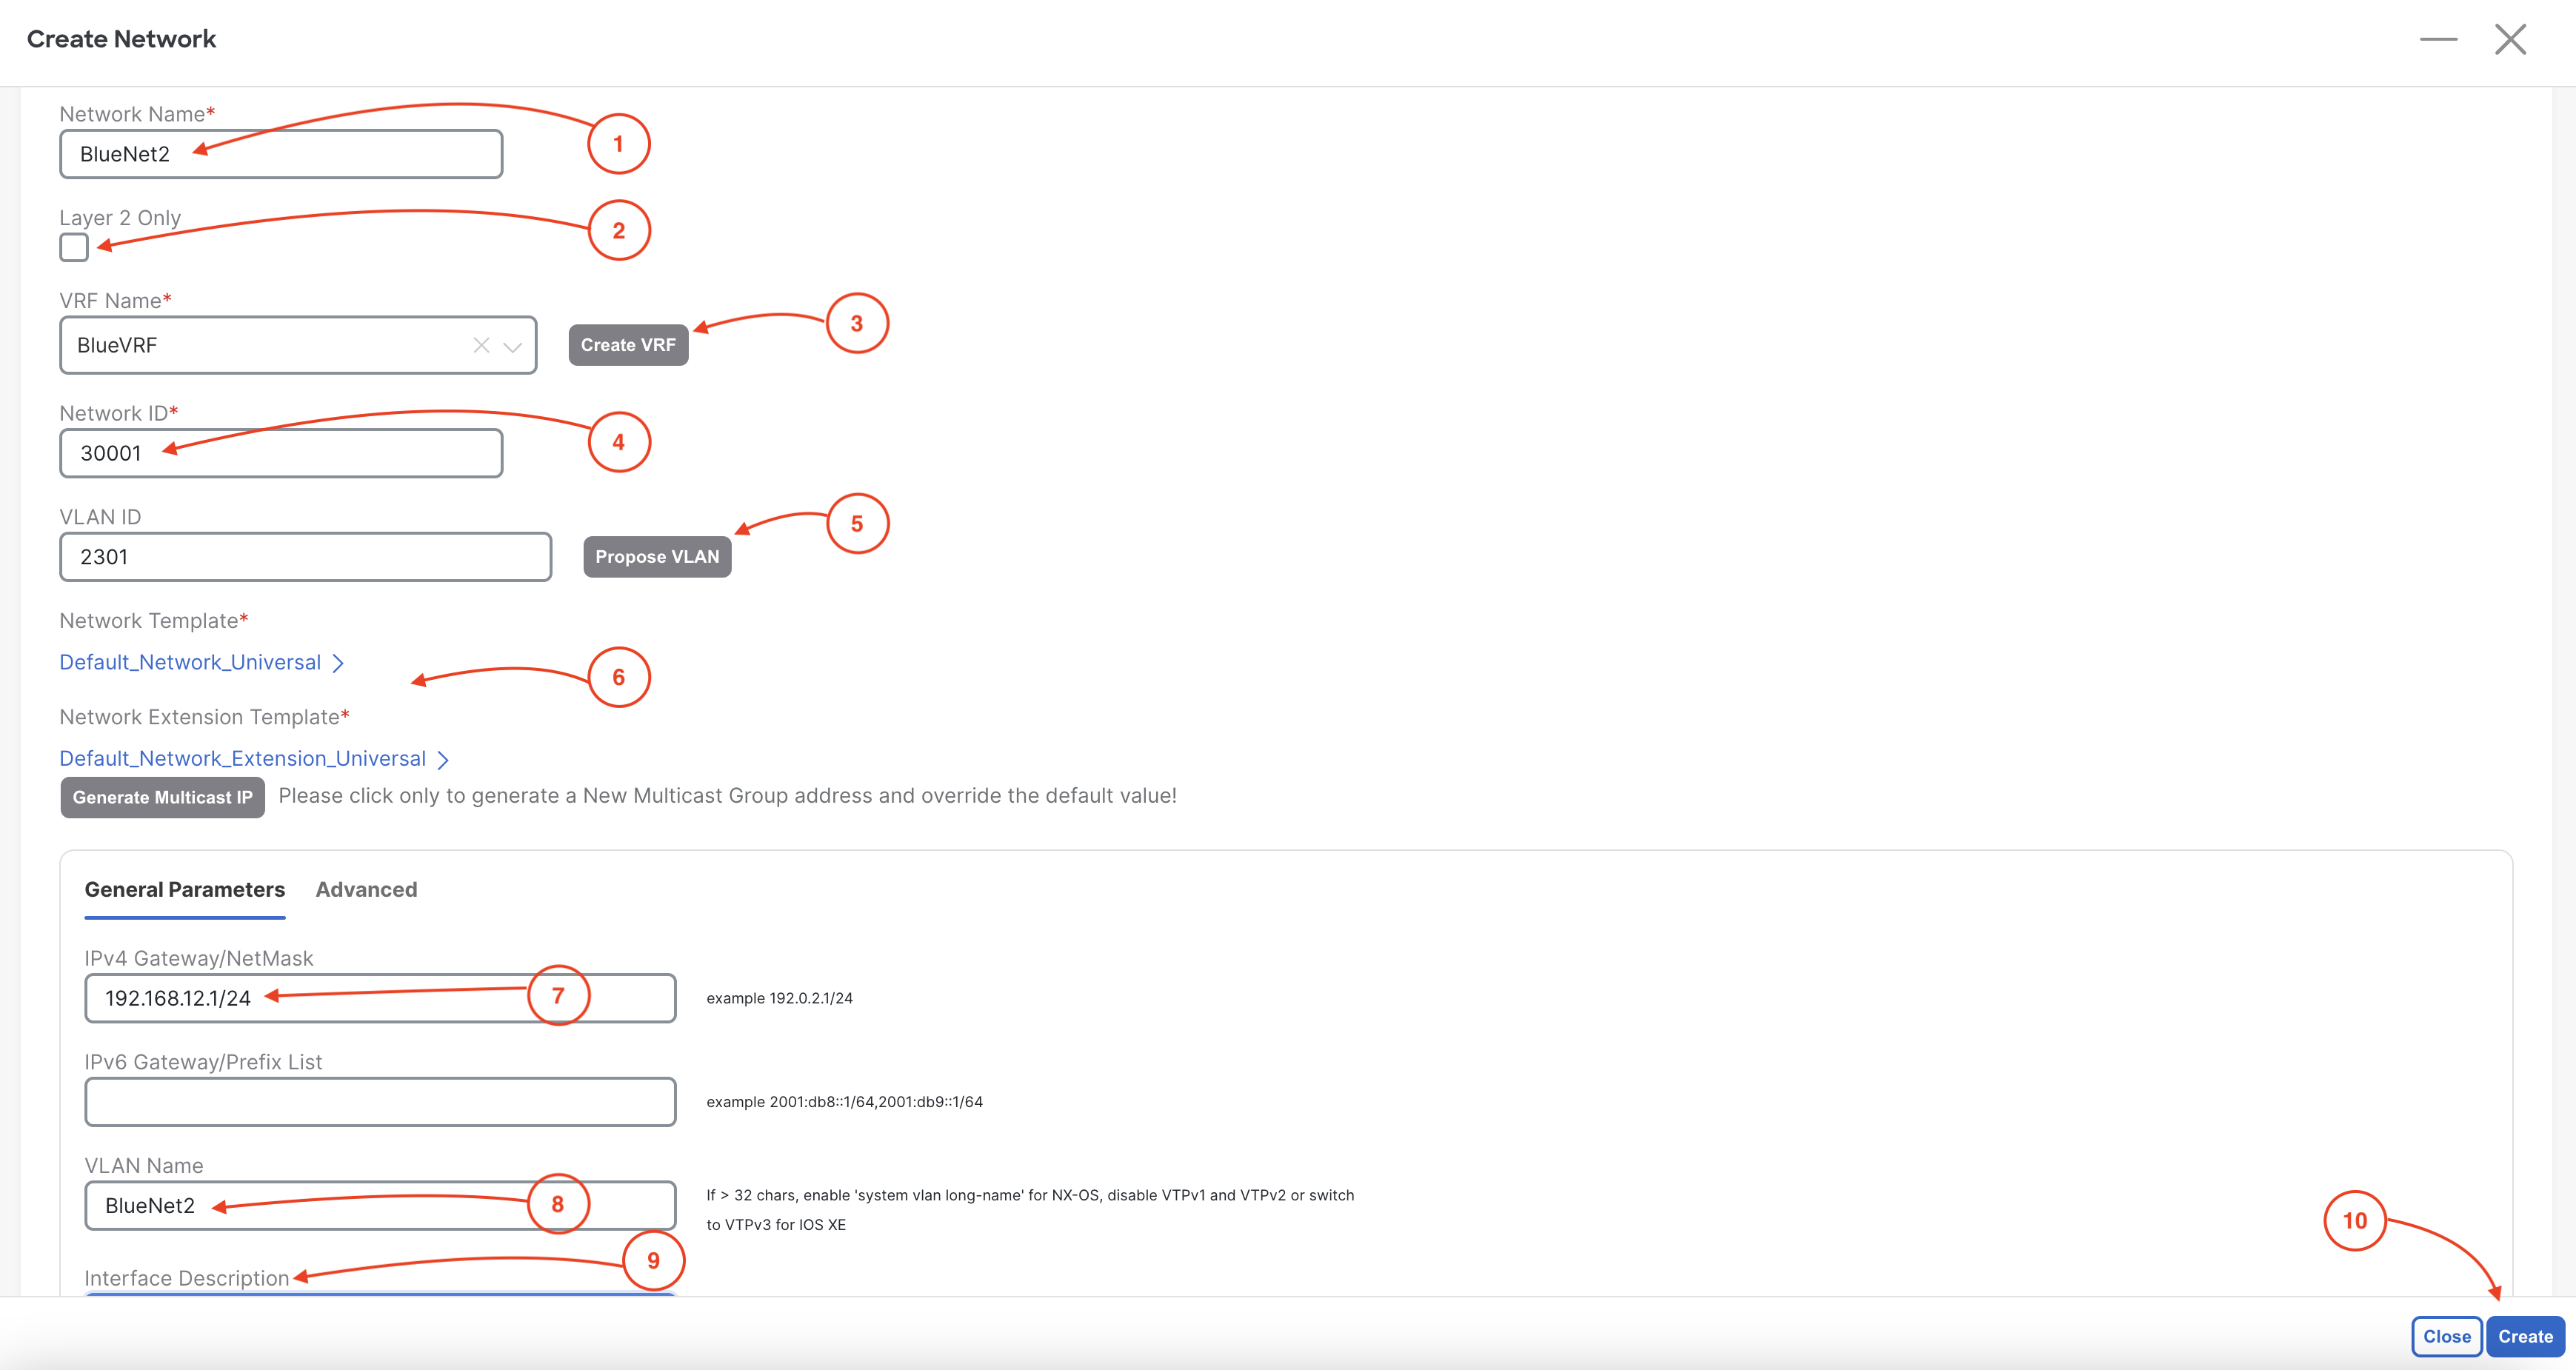
In the Create Network wizard, populate the parameters to build the network configuration for your first network:

Repeat the steps above to create a second Network (L2VNI) under Networks:

In the Create Network wizard, populate the parameters to build the network configuration for your first network:
Confirm the two Networks are created. The current status should display as NA as the Networks are not attached and deployed to a leaf switch yet.
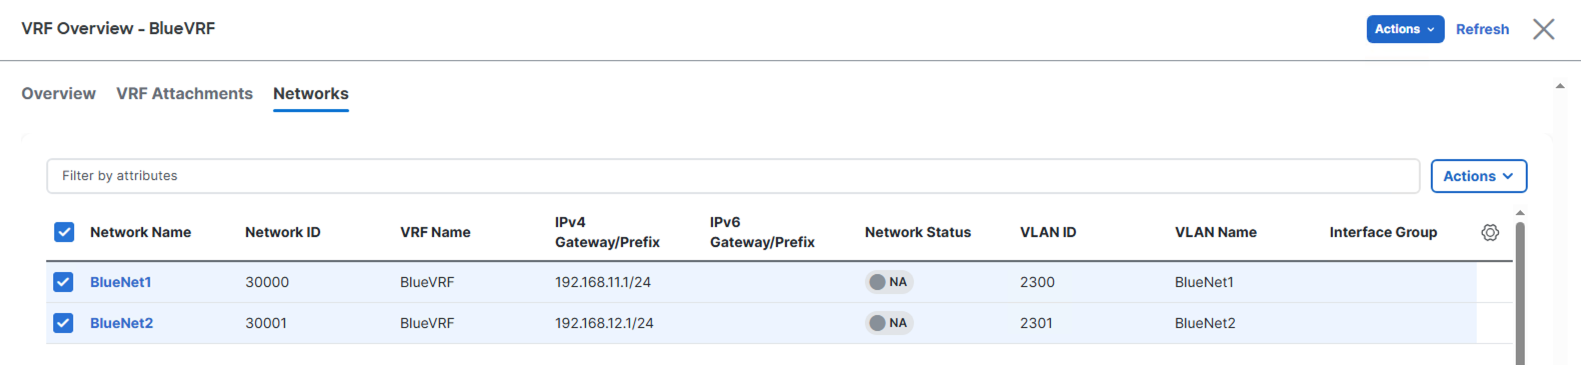
You created two overlay networks (BlueNet1 and BlueNet2) under BlueVRF, each with its own Layer 2 VNI, VLAN, and anycast gateway. Nexus Dashboard automatically manages the VNI-to-VLAN mappings and ensures the anycast gateway IP is consistent across all leaf switches. What would require configuring VLANs, SVIs, EVPN route-targets, and NVE members on every switch is reduced to filling out a simple form in ND.
Continue to the next section to attach your Networks and subsequently attach your VRF automatically to your Site1-L1 and Site1-L2 switches.
