With your Greenfield fabric created and deployed, your focus is now toward your Brownfield fabric. This will be your Site2 fabric.
A Brownfield fabric migration requires best practices to be followed on the existing fabric such as maintain consistency of the overlay configurations.
Like the Greenfield fabric you created, you will create the same type of "Data Center VXLAN EVPN". When creating the Site2 fabric, you must ensure the
configuration parameters align with the existing fabric. You will step through these in the steps below.
Step 1 - Navigate to Fabrics
- Click and expand Manage on sidebar
- Then click Fabrics

Step 2 - Launch Create Fabric
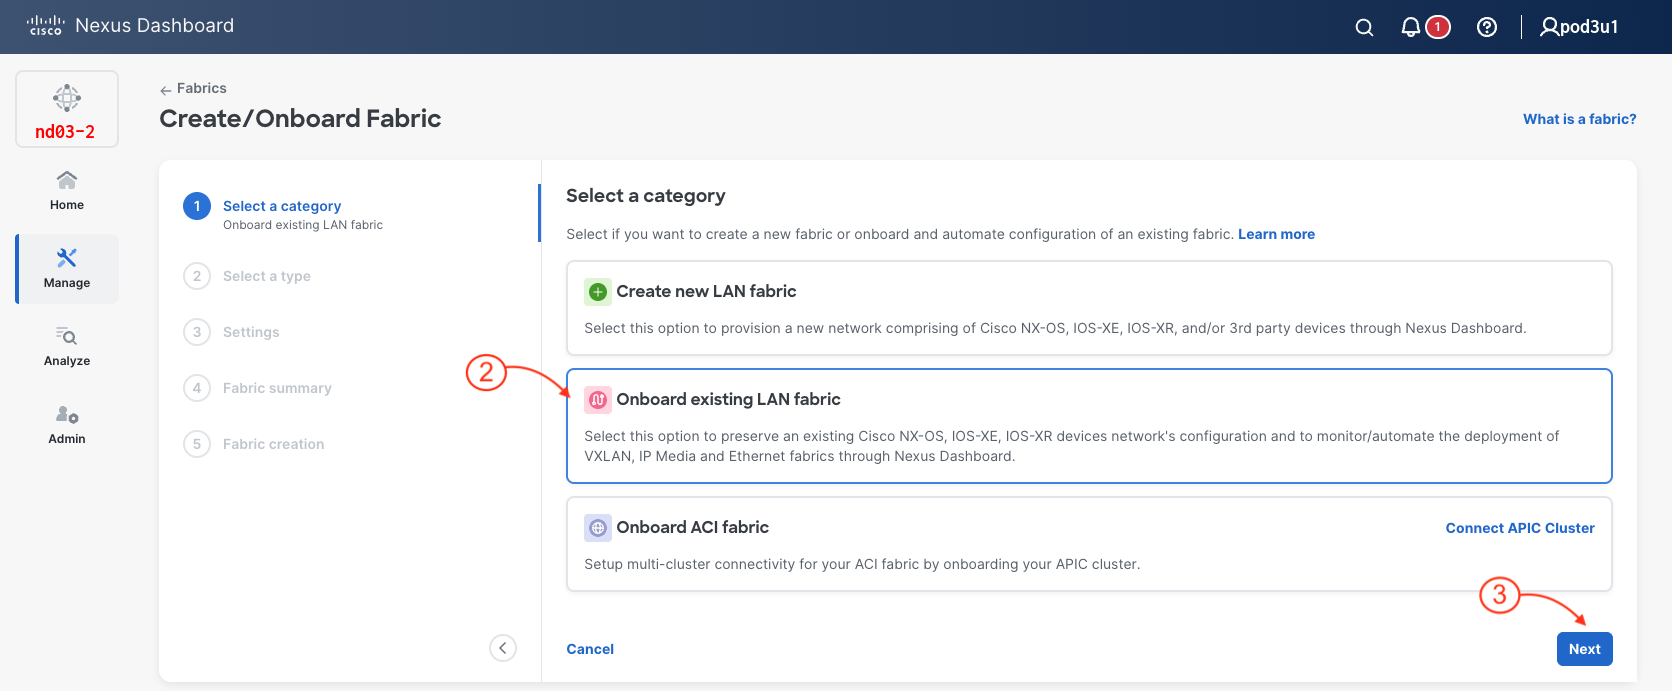
- Click Create Fabric

- Click Onboard existing LAN fabric
- Click Next
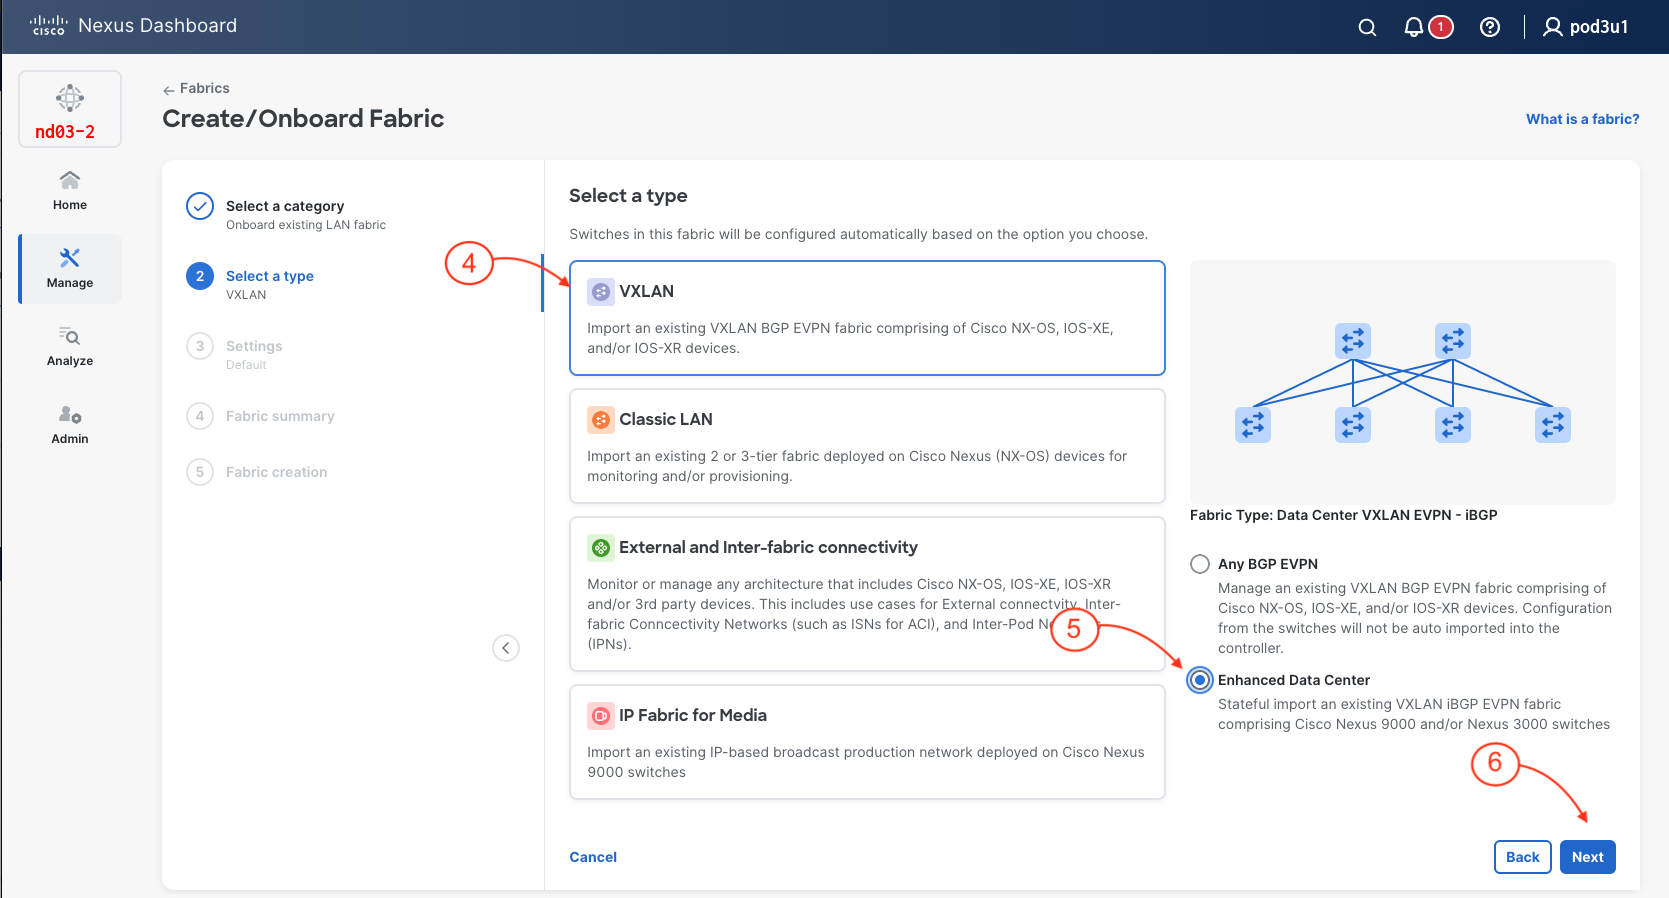
- Click VxLAN
- Click Enhanced Data Center
- Click Next
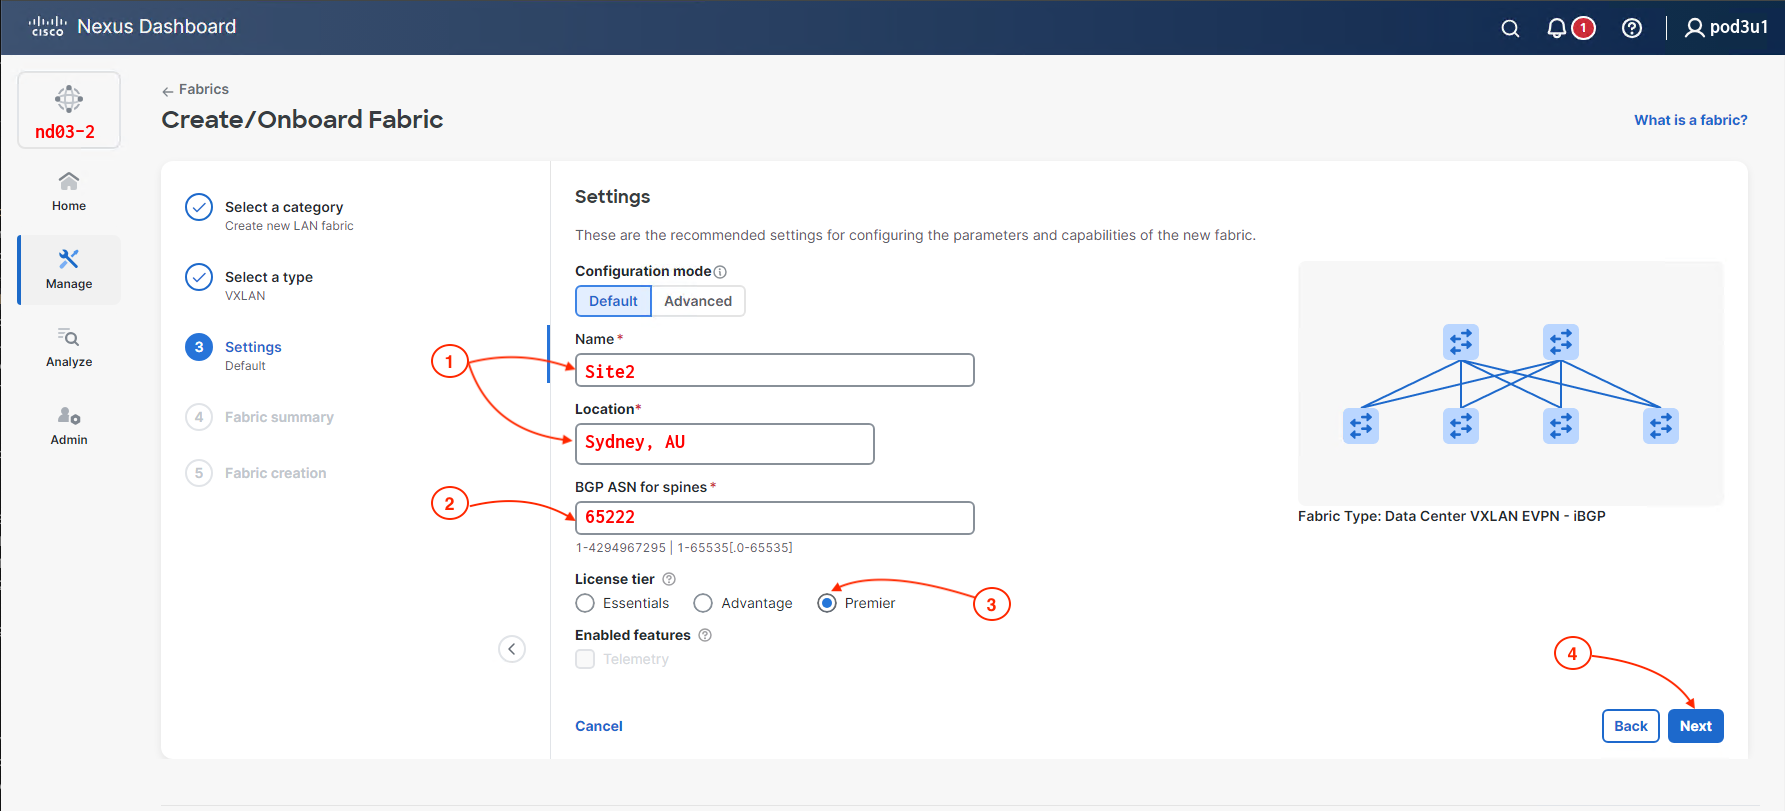
Step 3 - Fabric Settings
In the Create Fabrics popup wizard:
- Name the fabric:
Site2
and Under Location Type:
Sydney, AU
- Set the BGP ASN to
65222
- Set The license Tier to Premier
- Then, click Next
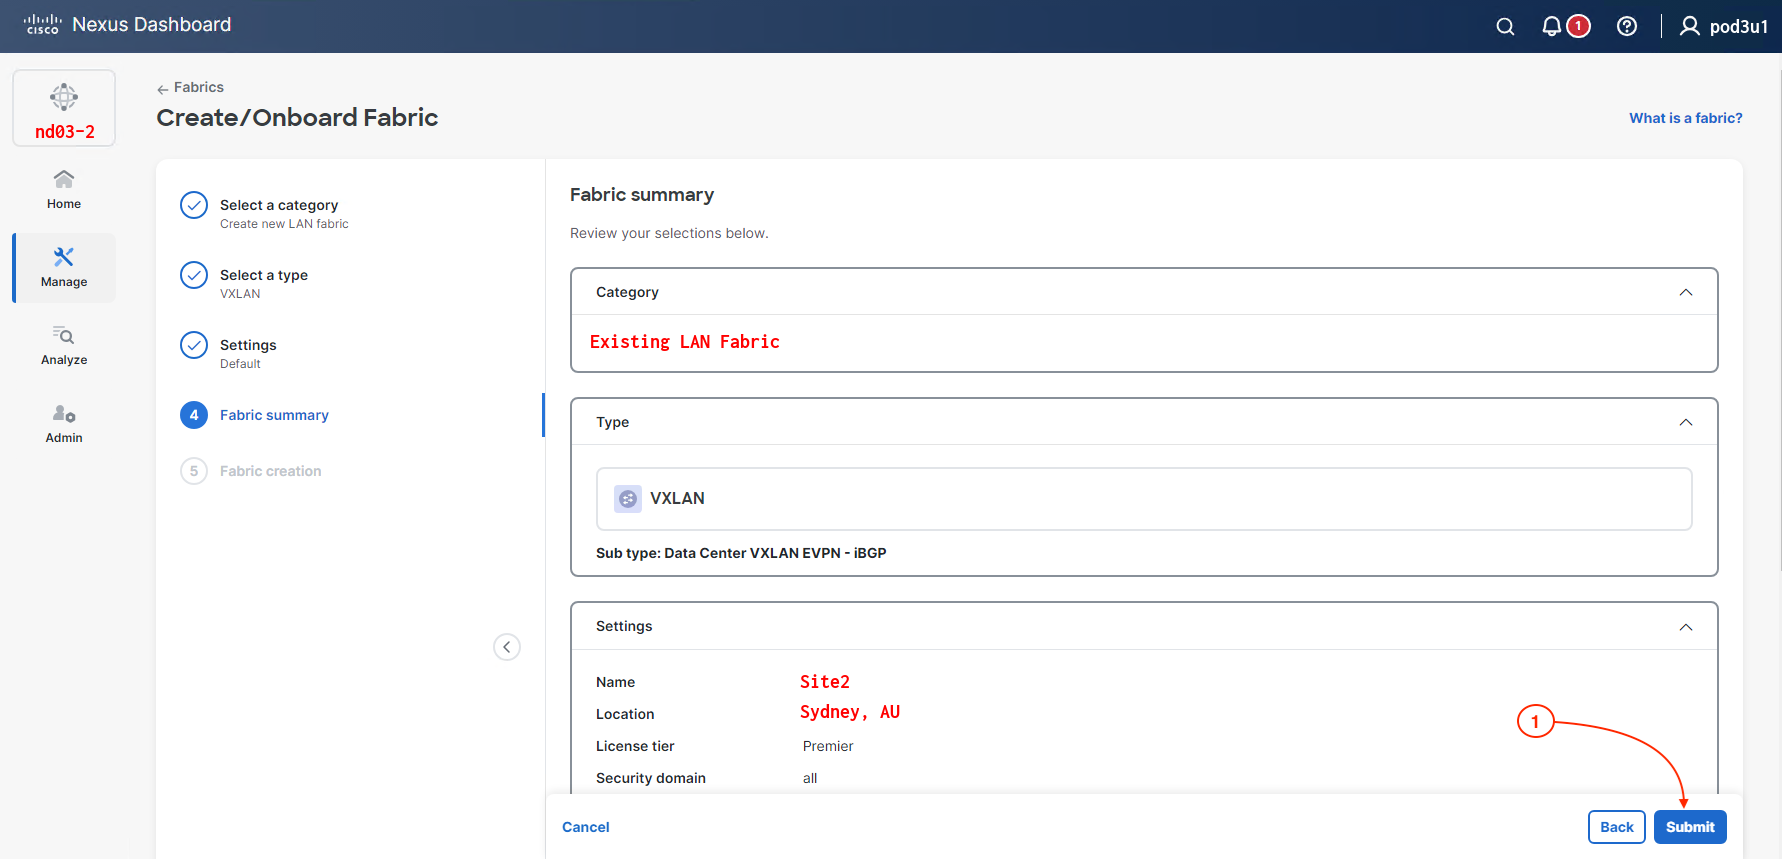
- Click Submit
- Click View fabric details

Step 4 - Edit Fabric Setting Type
- Click Actions
- Then click Edit Fabric Settings
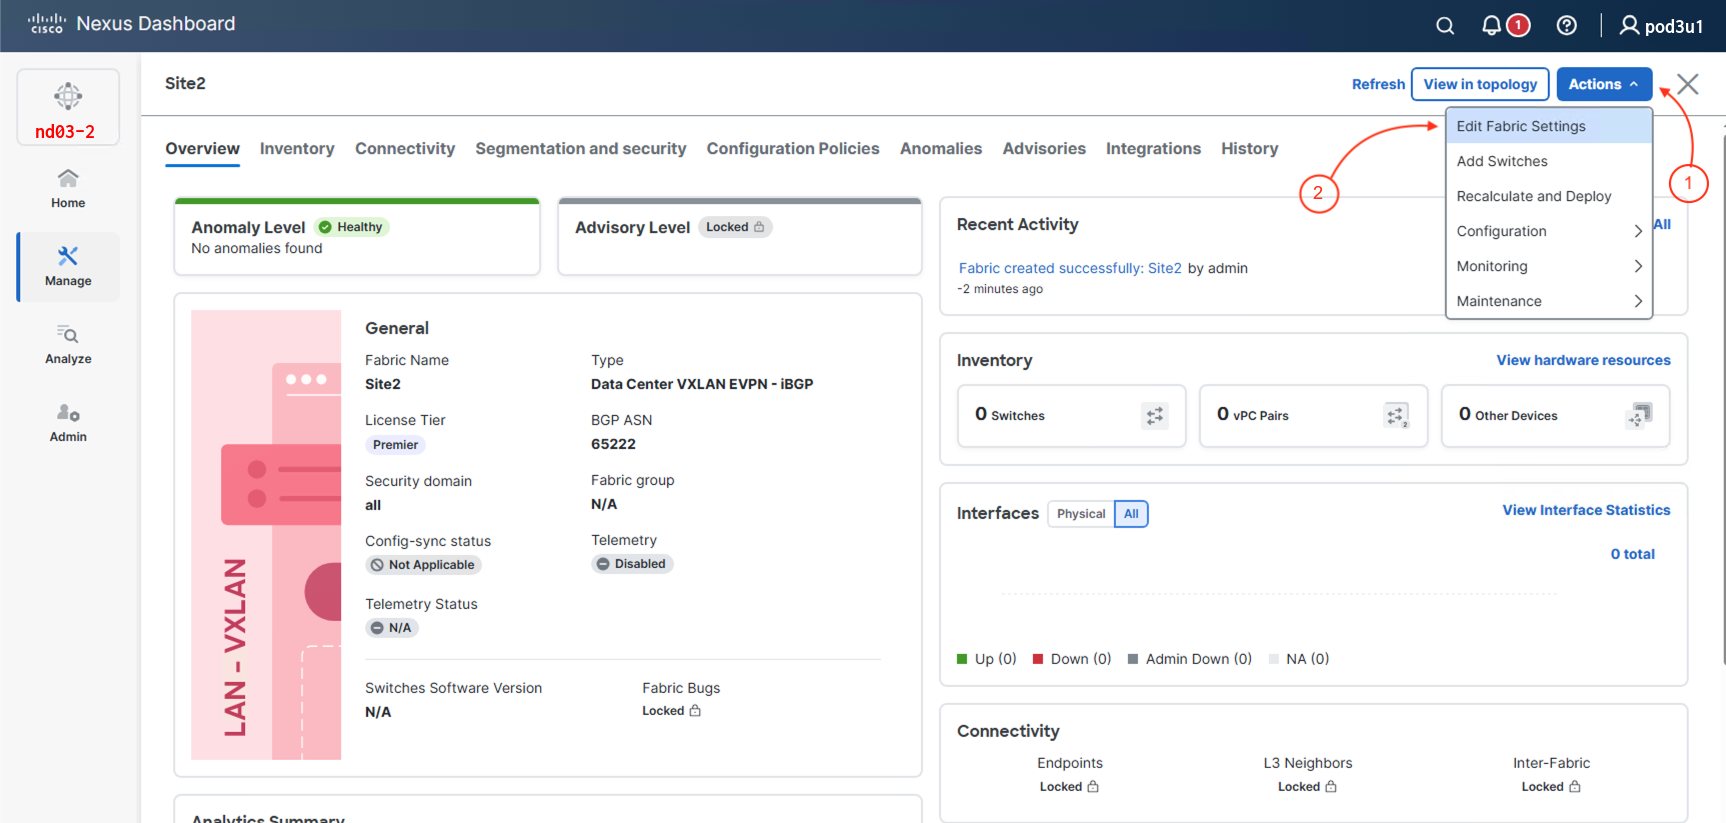
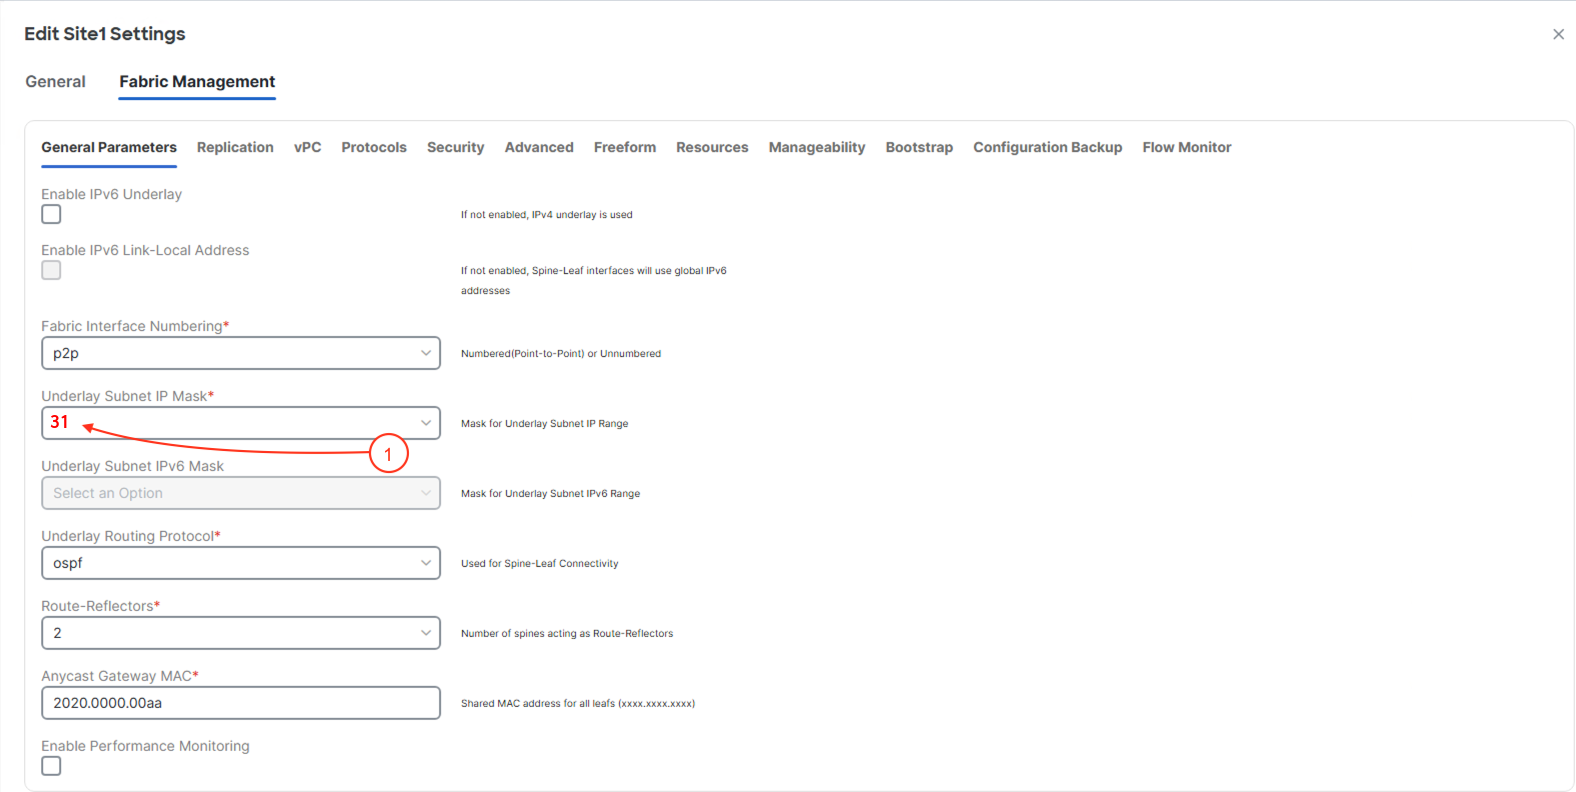
Step 5 - Define General Parameters
- Click Fabric Management
- Set the Underlay Subnet IP Mask to 31 for point-to-point
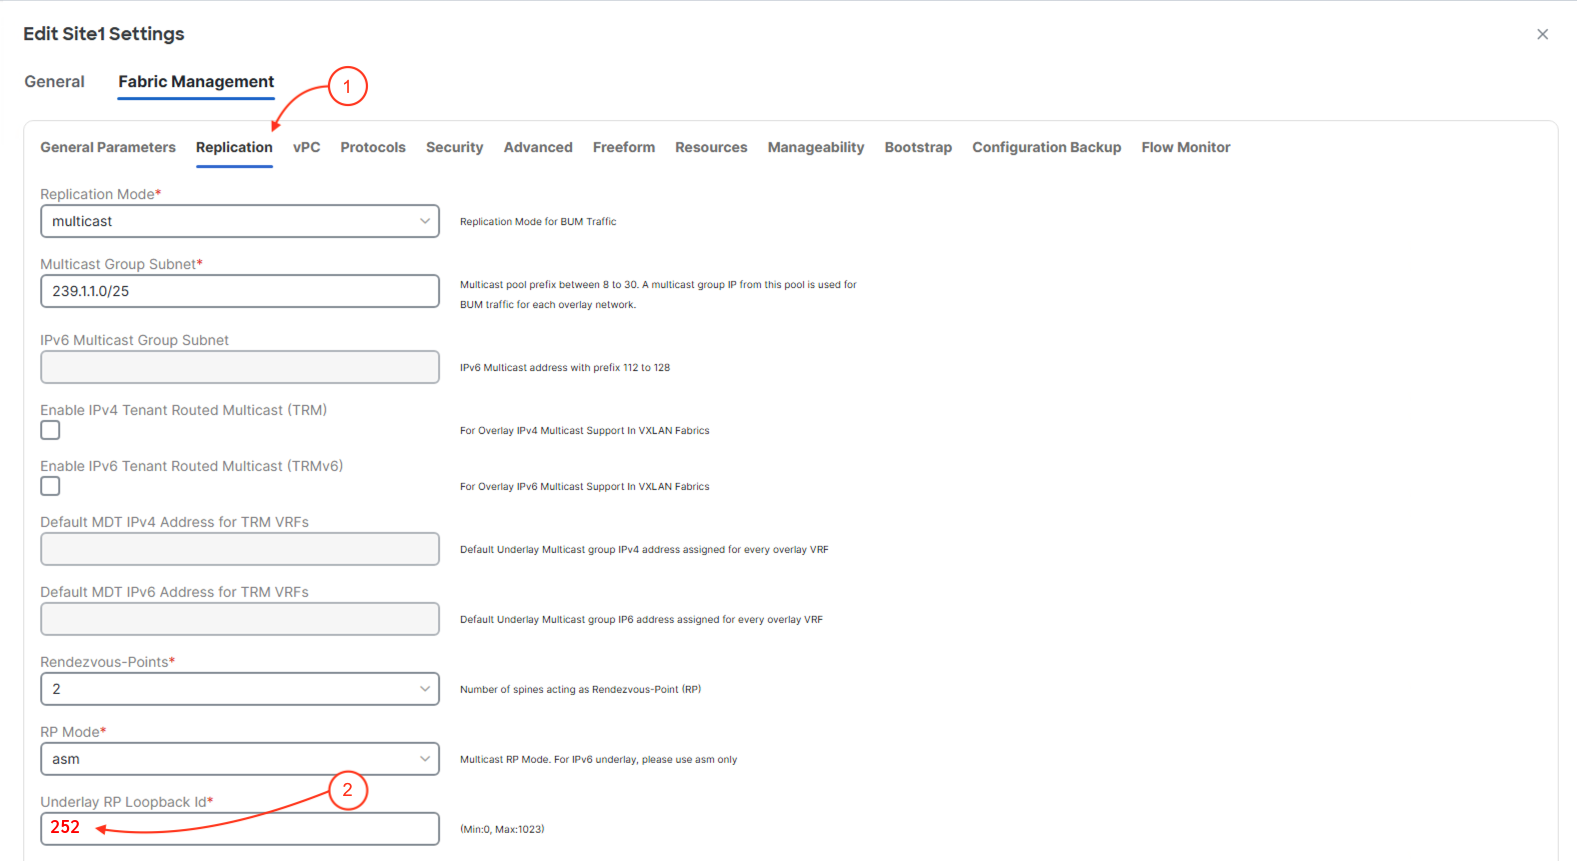
Step 6 - Define Replication Parameters
- Select Replication tab
- Change the RP Loopback interface to
252
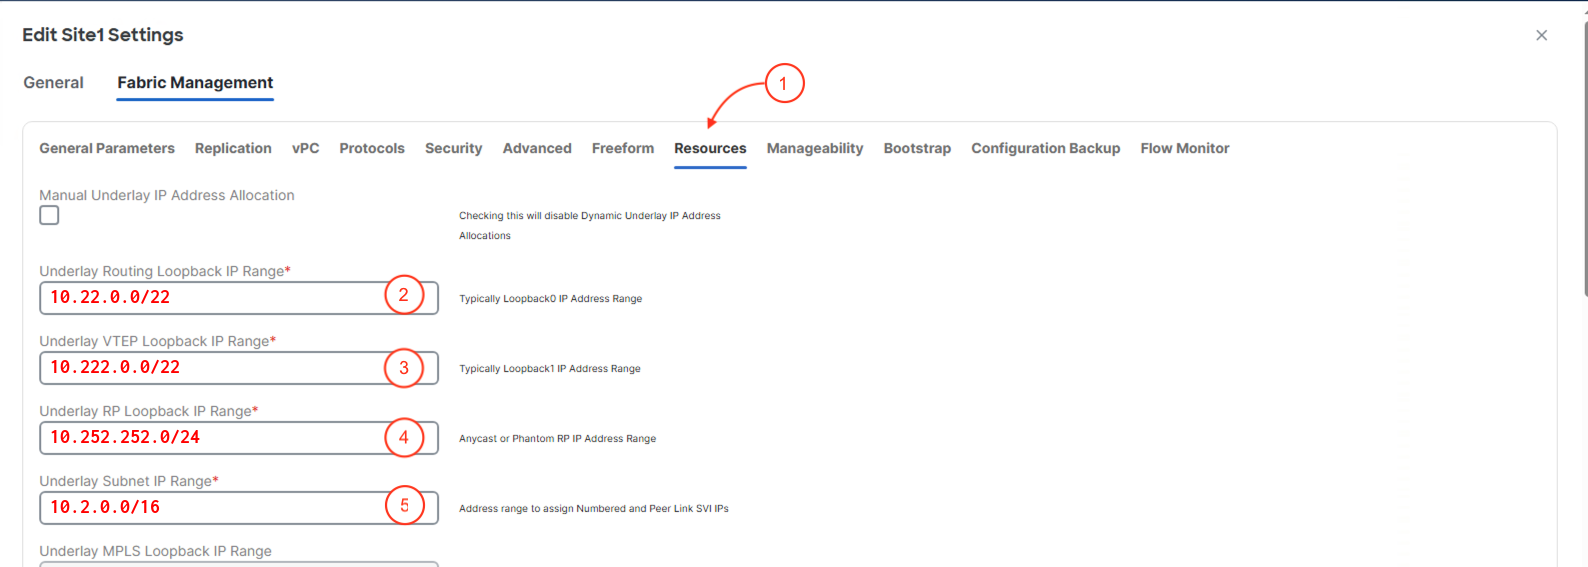
Step 7 - Define Resources Parameters
- Click the Resources tab
- Underlay Routing Loopback IP Range:
10.22.0.0/22
- Underlay VTEP Loopback IP Range:
10.222.0.0/22
- Underlay RP Loopback IP Range:
10.252.252.0/24
- Underlay Subnet IP Range:
10.2.0.0/16
Step 8 - Define Manageability Parameters
- Click the Manageability tab
- DNS Server IP(s):
10.0.226.251
- DNS Server VRFs:
management
- NTP Server IP(s):
10.81.254.202
- NTP Server VRFs:
management
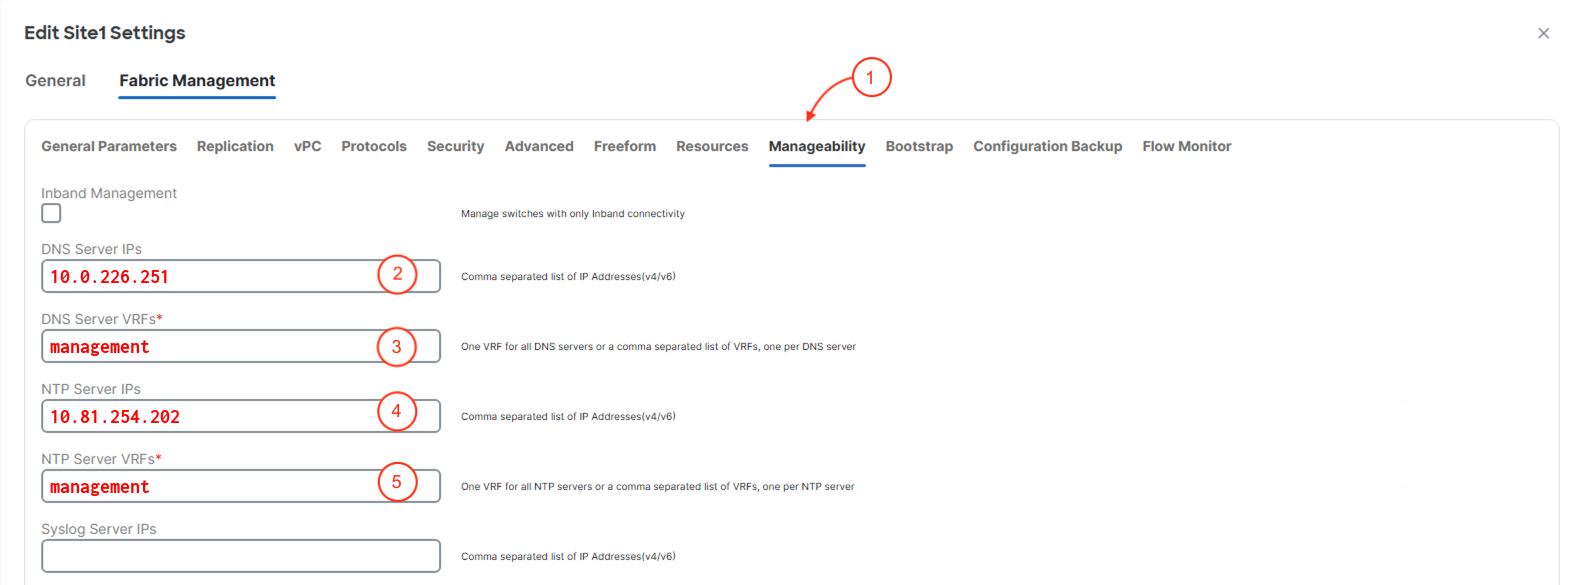
- Scroll Down and Click Save at the bottom right.

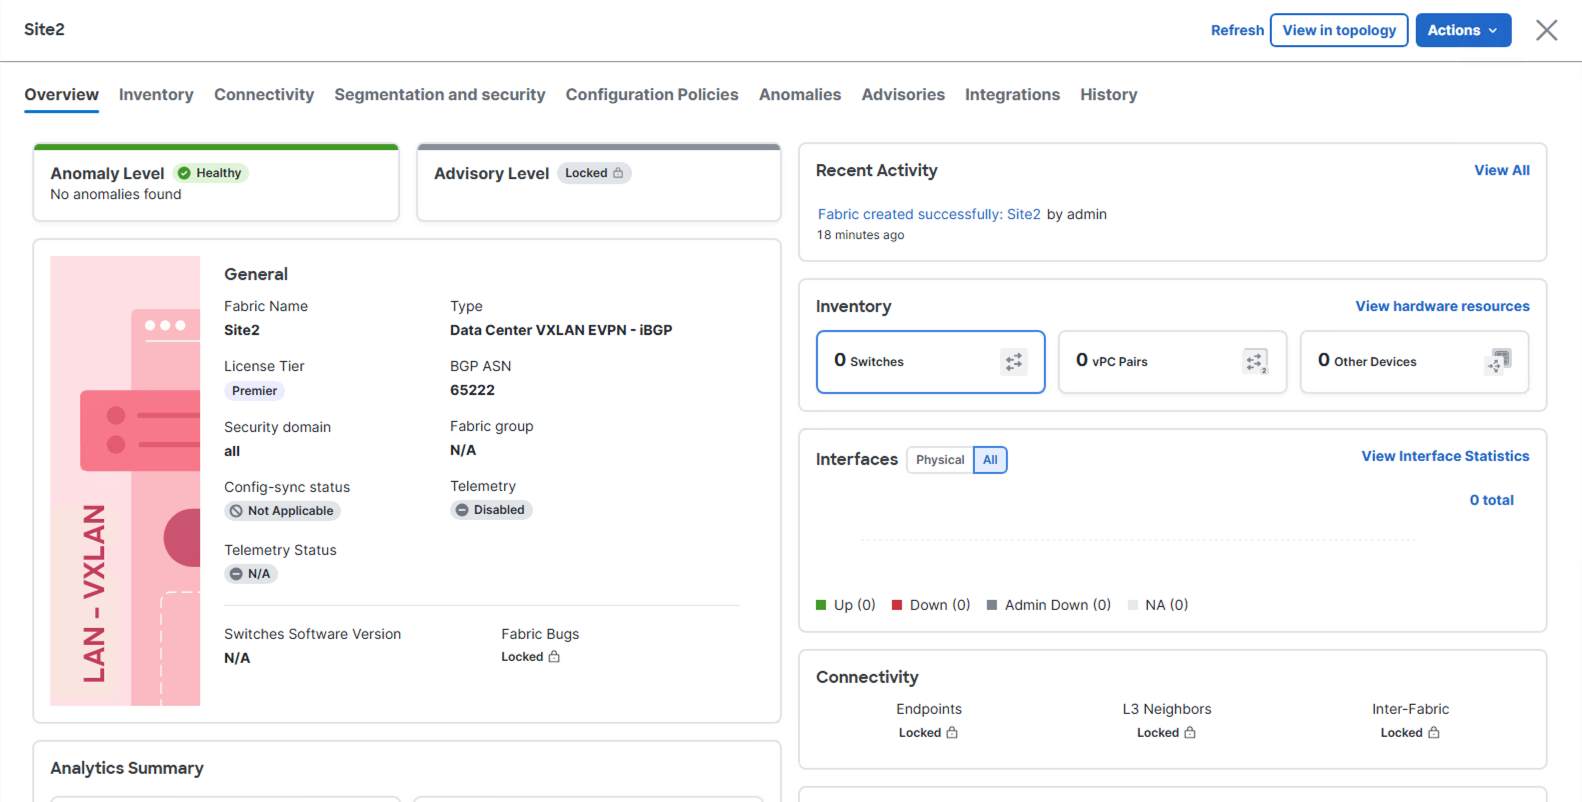
Step 9 - View Fabric Site2 Overview
Summary
You created a Brownfield VXLAN EVPN fabric (Site2) by onboarding an existing network into Nexus Dashboard. Unlike Site1's Greenfield approach, ND's Brownfield workflow preserves the existing switch configurations while bringing them under centralized management. ND automatically discovers the running VRFs, networks, and VLANs already configured on the switches. This is critical for production environments — you get all the benefits of ND's automation and visibility without disrupting what's already working.
Continue to the next section to discover and import your Brownfield fabric switches into your Site2 fabric.


