In a VXLAN EVPN setup, a Layer-3 VNI (L3VNI) is needed for inter-VXLAN routing using symmetric IRB. The L3VNI is tied to a tenant VRF, which keeps each tenant's routing separate. Nexus Dashboard simplifies this process by automating and verifying the complex VRF, BGP EVPN, and VXLAN configurations, making it easier to manage large environments. In this section, you’ll create and stage the first tenant VRF and its L3VNI. Next, you’ll learn to create networks with L2 VNIs and VLANs and link them to the tenant VRF.
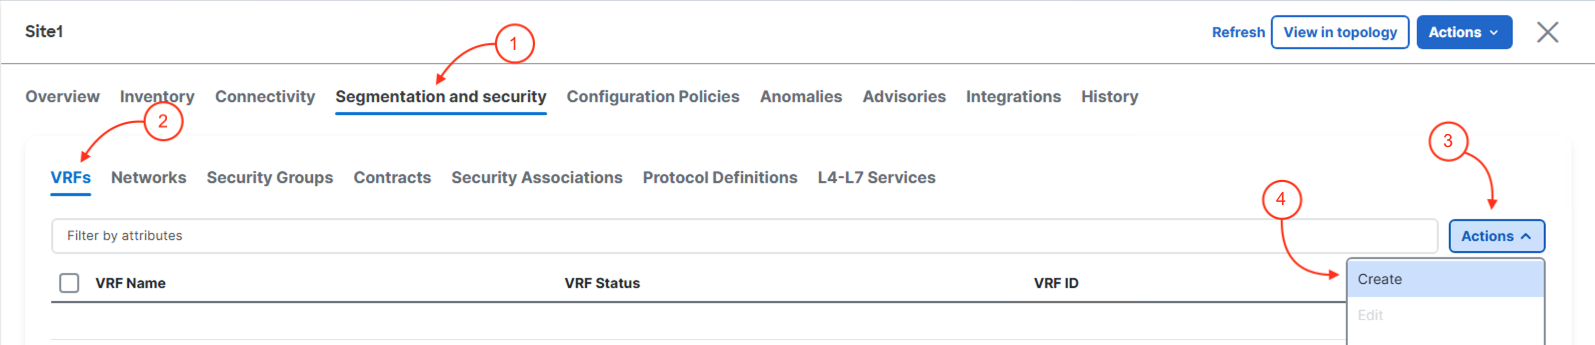
From the Interfaces view, navigate to VRFs.
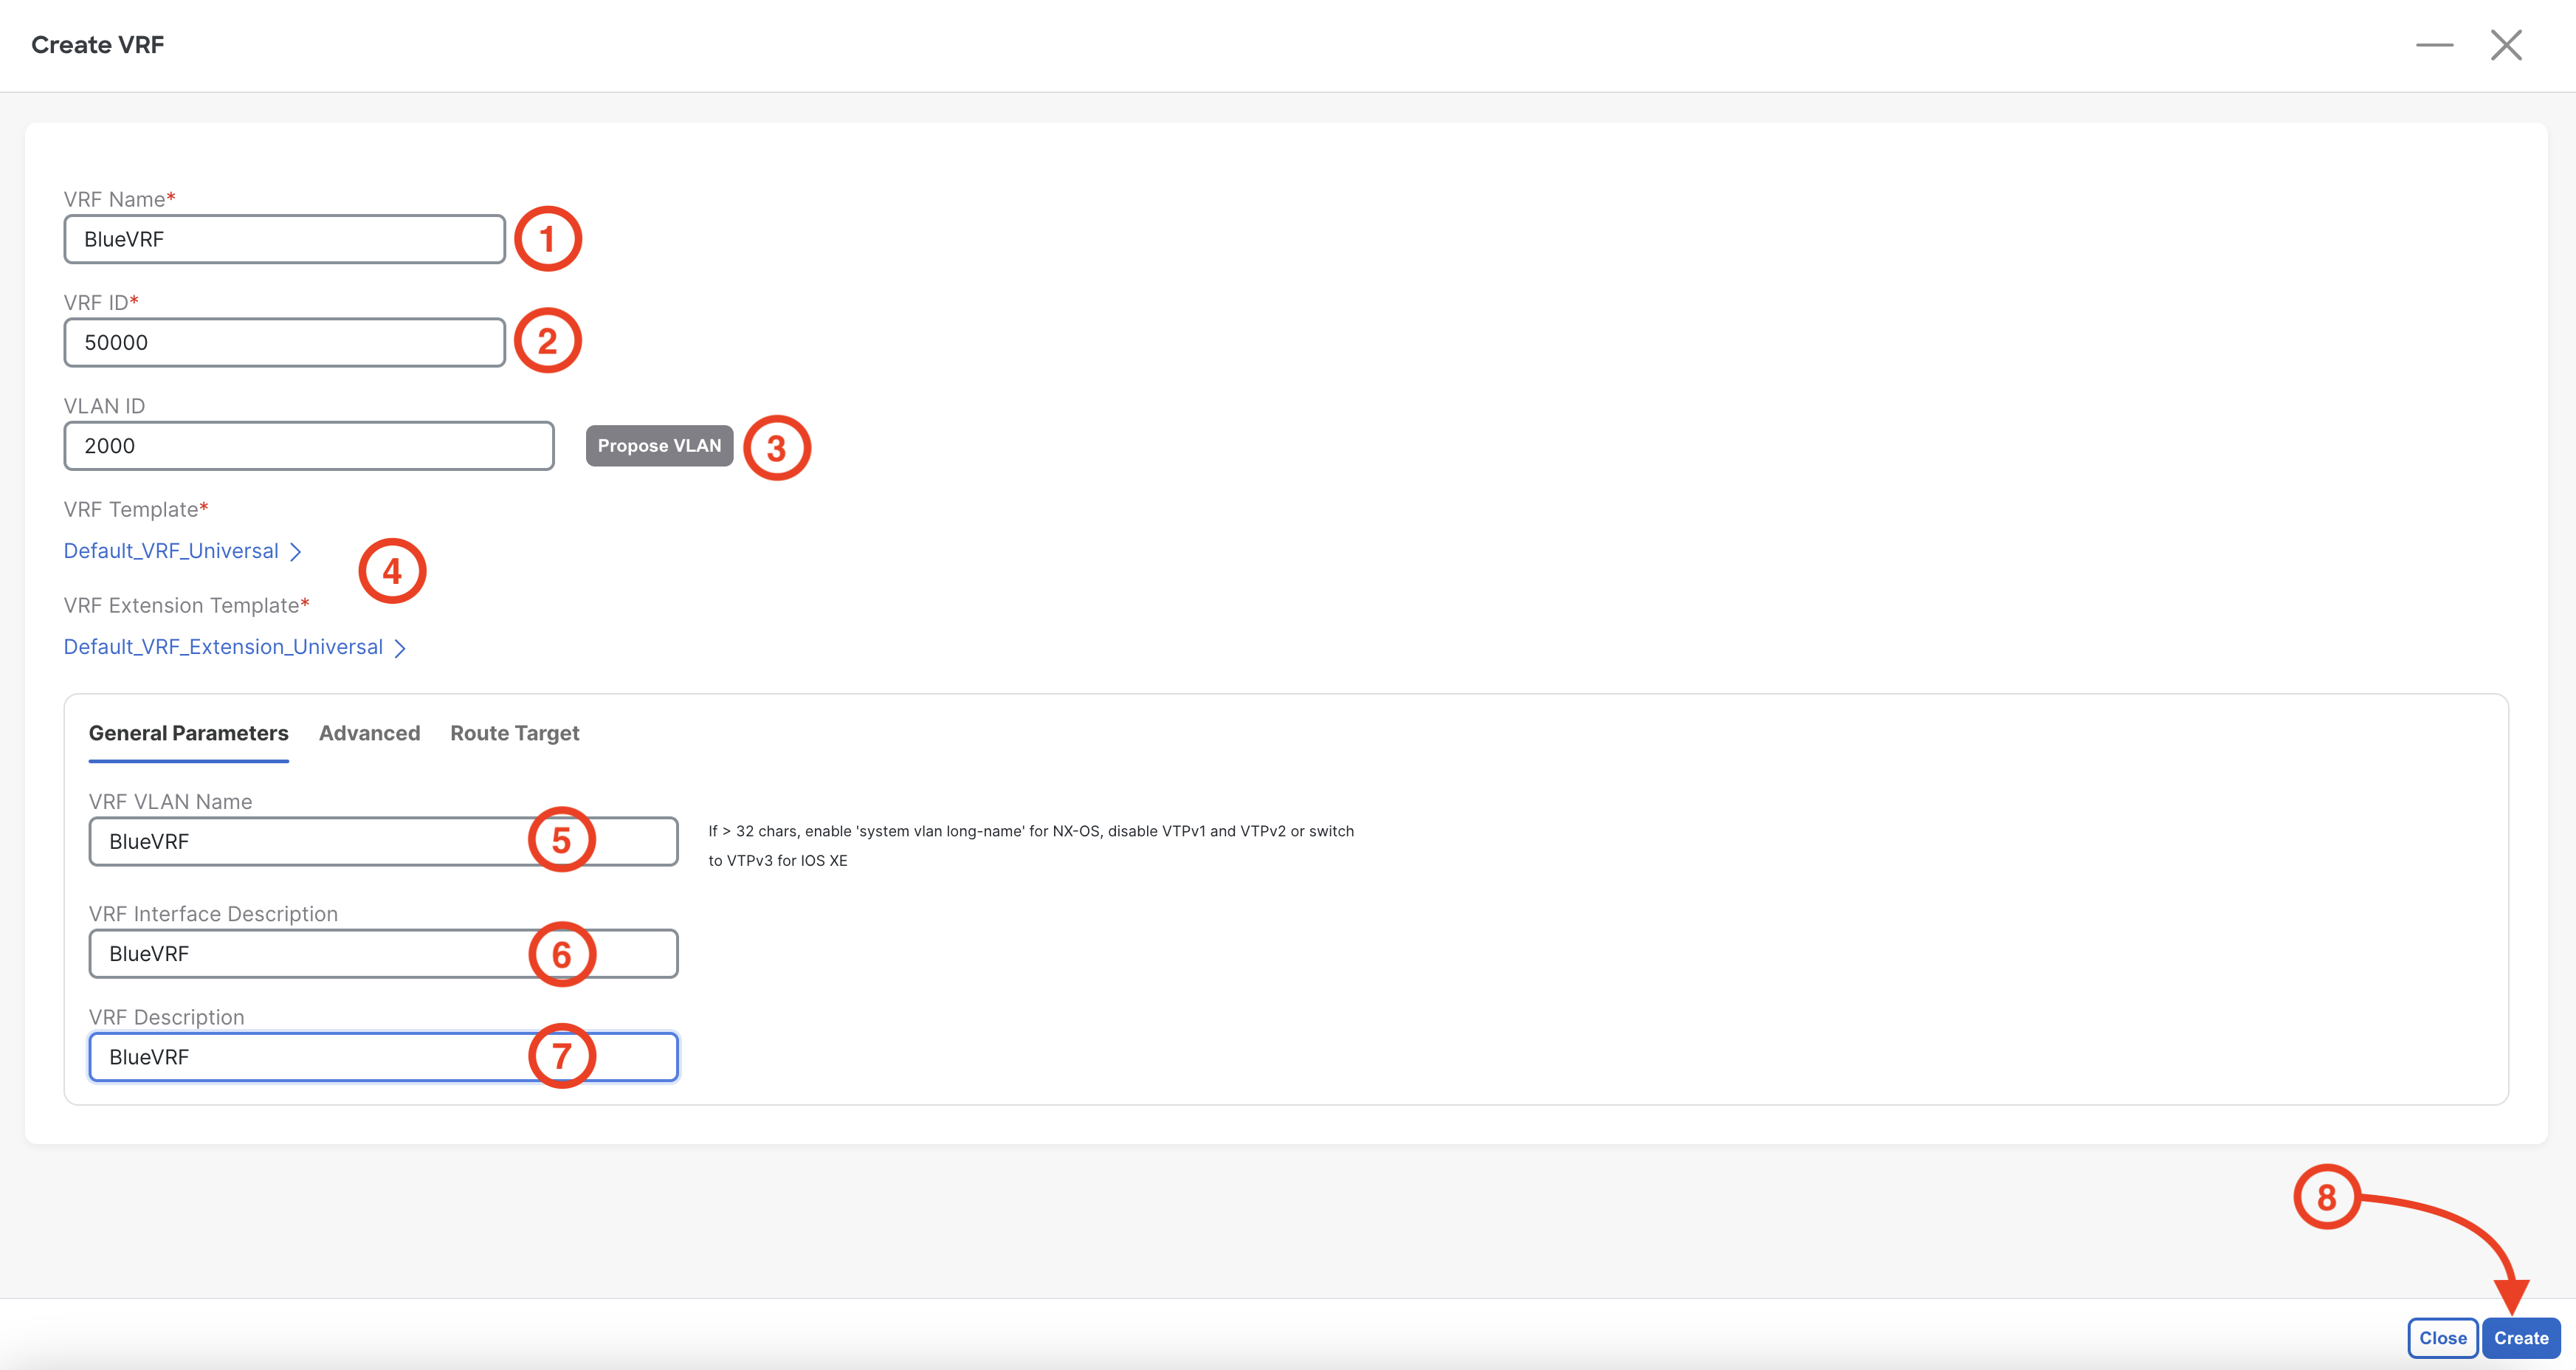
In the Create VRF wizard, populate the configuration parameters. You most likely can see how these fields align to the common command line configuration for a VRF on NX-OS.
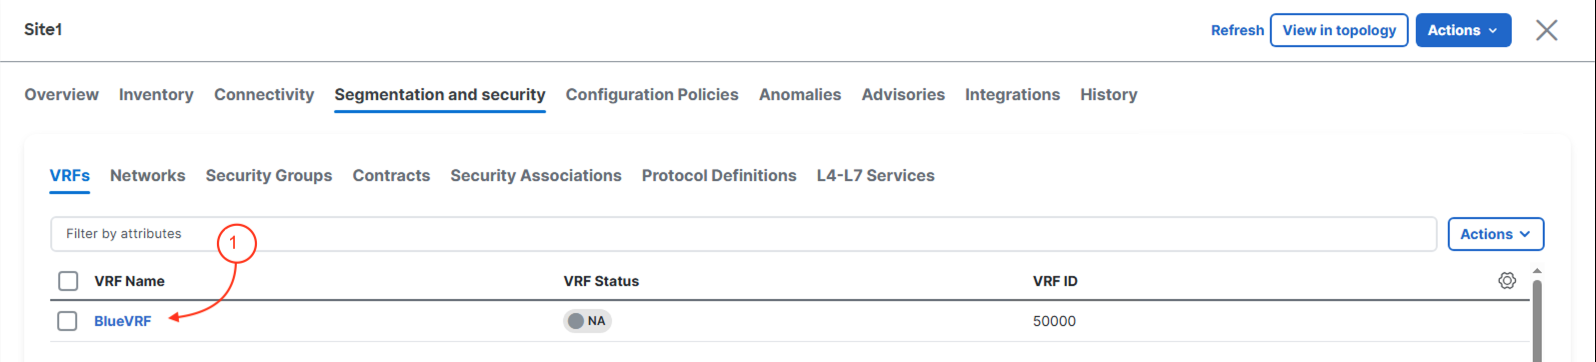
Confirm the VRF is created. The current status should display as NA as the VRF is not attached and deployed to a leaf switch yet. Also confirm that the VRF ID is 50000. Again, the VRF ID is also considered the L3VNI or VNI ID.
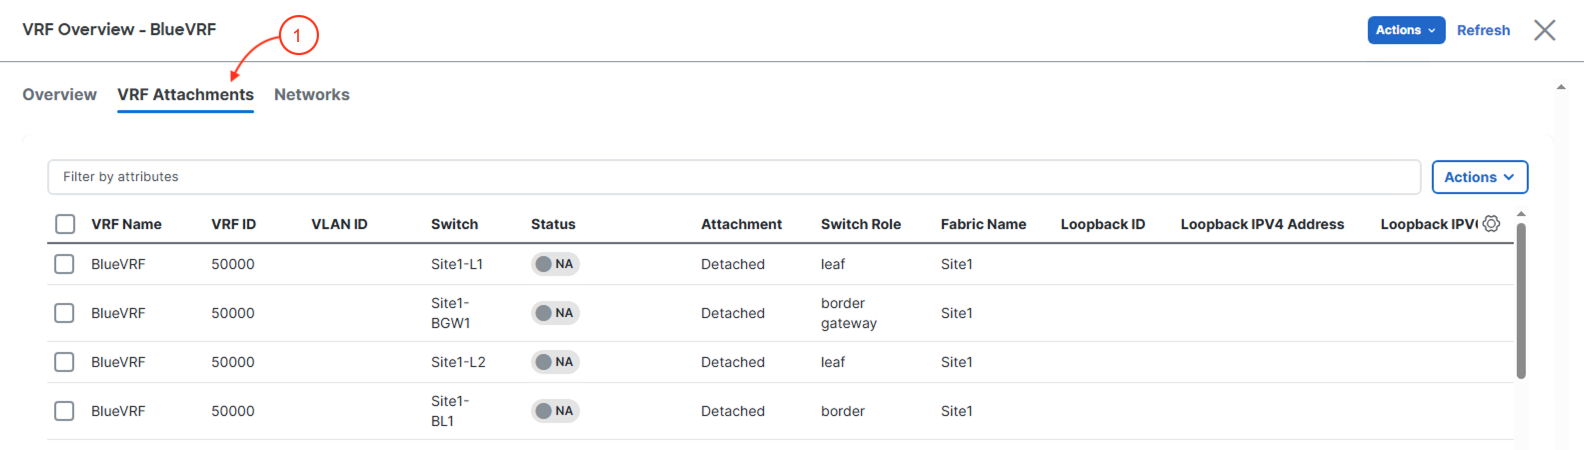
You created your first VRF (BlueVRF) in the Site1 overlay. Nexus Dashboard automatically assigned VNI and VLAN IDs, generated the VRF configuration, and determined which switches need the VRF based on their roles. Creating a VRF that provides Layer 3 segmentation across your entire VXLAN EVPN fabric took just a few fields in a wizard — ND handles all the underlying NVE, BGP, and SVI configuration behind the scenes.
Continue to the next section to create Networks in your Site1 Greenfield fabric.
