The Loopback interface and policy template you created now need to be deployed. Instead of deploying each at a time, you previously saved them to stage for deployment at the same time. This will be done from the Switches tab.
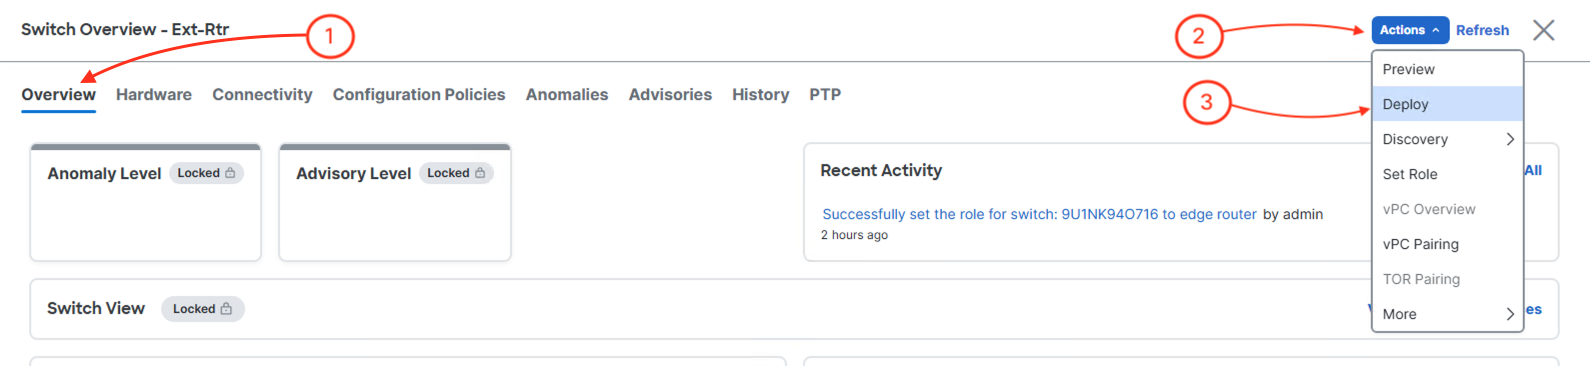
Navigate back the Switches tab to launch the deployment of the Loopback interface and BGP policy you created.
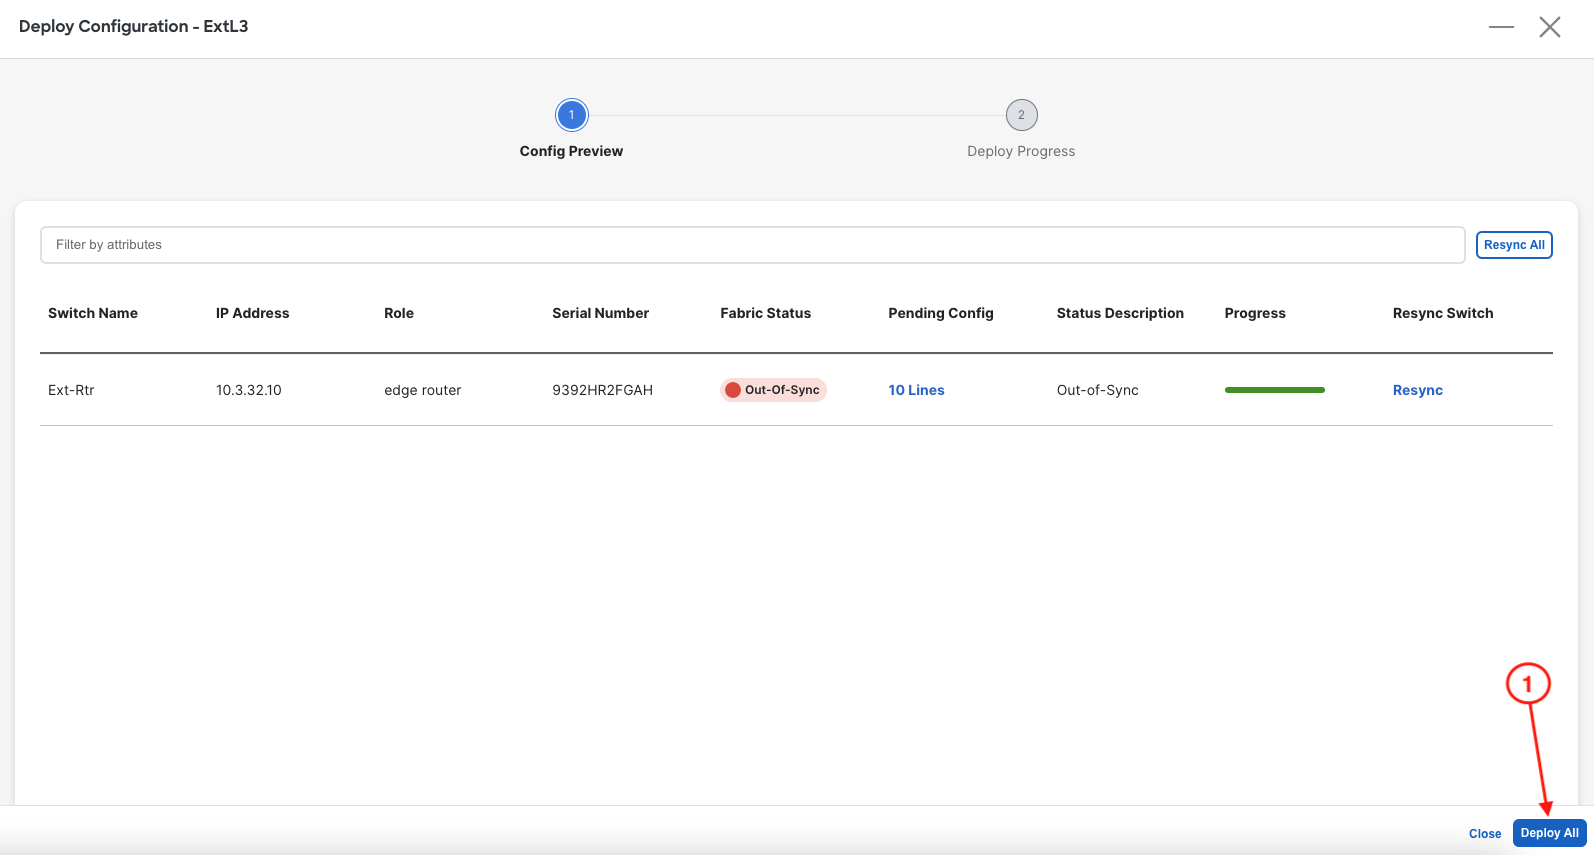
The total lines of configuration between creating the loopback and adding a BGP network statement for the Loopback interface is 10 lines. Once done reviewing:
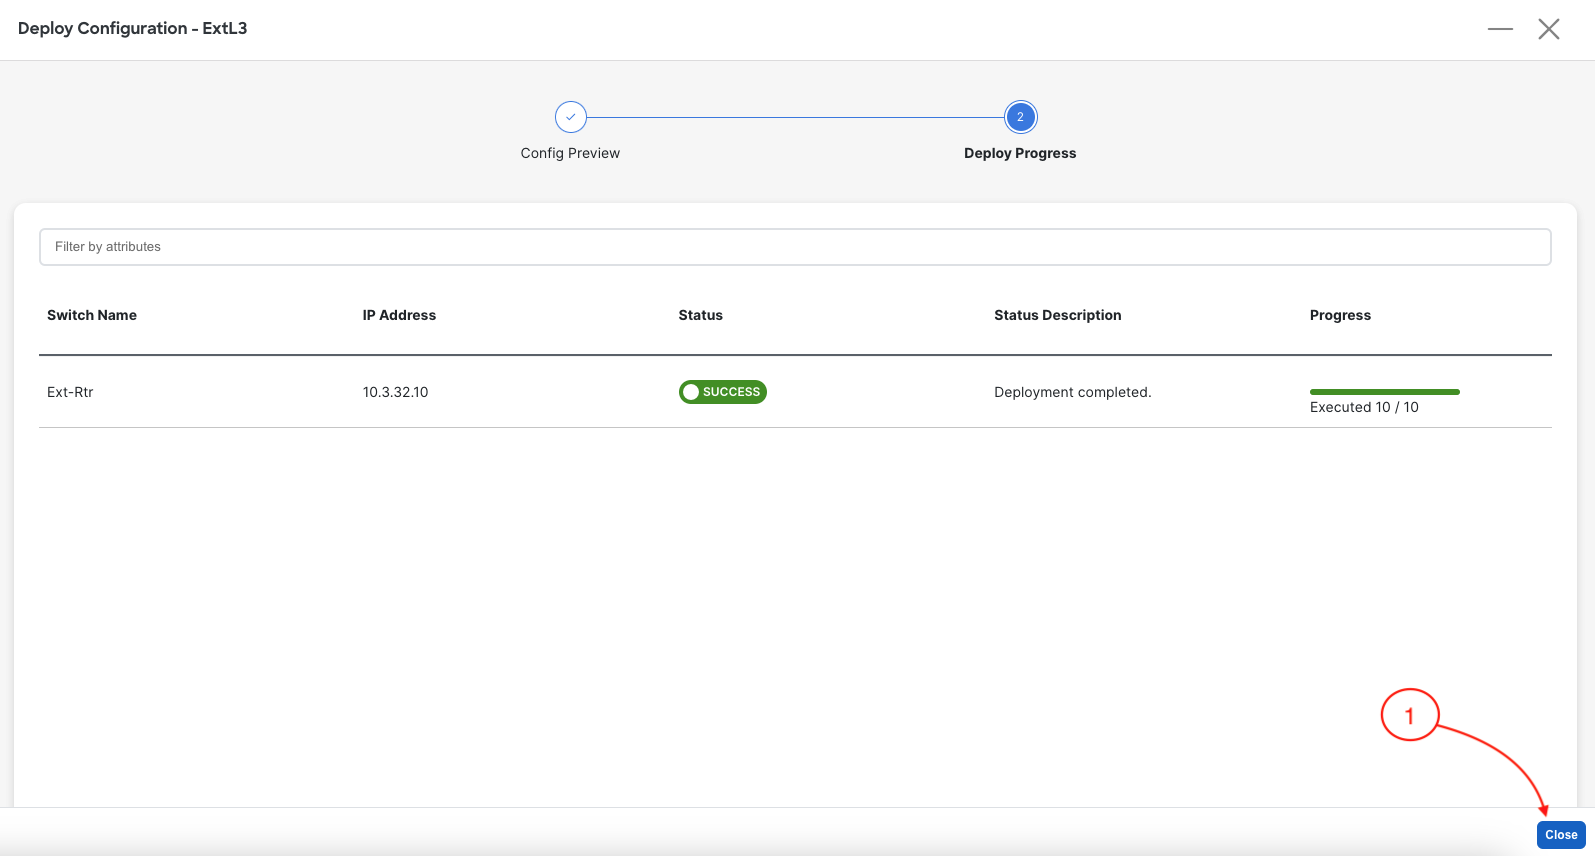
Upon a successful deployment, Nexus Dashboard's Deploy Configuration wizard should look as shown in the screenshot below; all green with SUCCESS messages and each switch's expected configuration progress bar also displaying as green and fully executed. If any error occurred, Nexus Dashboard will display a notification and the status reverted back to Out-of-Sync.
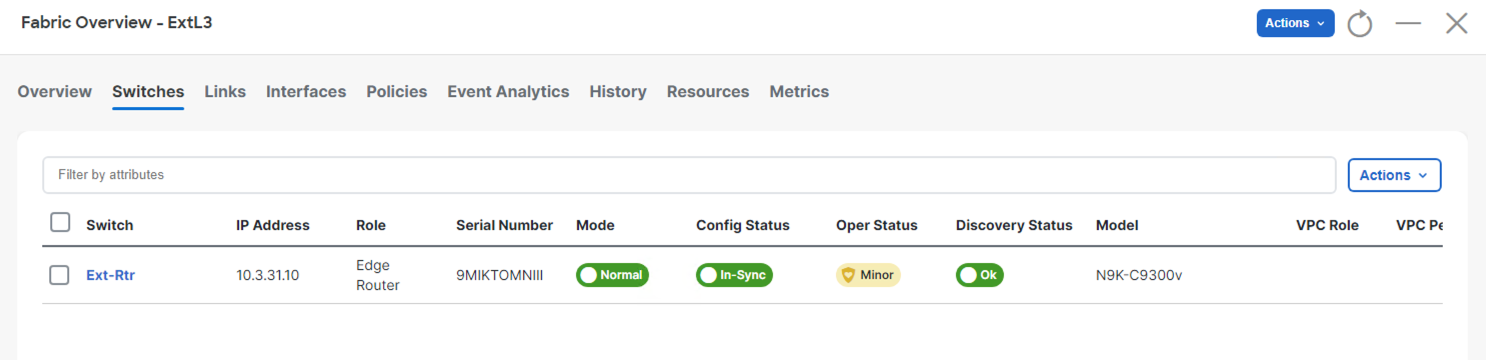
Back at the main Switches overview, your Ext-Rtr should display a Config Status of In-Sync. You may need to hit the Refresh button, if the Config Status has not been updated.
You deployed the loopback interface and BGP policy to the external router in a single operation. Nexus Dashboard batched both changes and pushed them together, bringing the Ext-Rtr back to an "In-Sync" state. The external route is now advertised into your VXLAN EVPN fabric via BGP, providing end-to-end reachability from your data center servers to the external network — all orchestrated through ND without touching the CLI.
Continue to the next section to verify external connectivity between your Site1 VXLAN EVPN fabric and your ExtL3 fabric.
